- Epicurious 101
- Season 1
- Episode 66
The Best Prime Rib You’ll Ever Make (Restaurant-Quality)
Released on 11/26/2024
I'm Frank Proto,
professional chef and culinary instructor,
and today, I'm gonna show you the best way
to roast a prime rib.
We're talking juicy, tender, delicious prime rib.
This is Prime Rib 101.
You look at a prime rib,
we're talking about it being a primal cut,
which means it's kind of from the center back of the animal,
whereas a prime piece of meat has more to do
with the grading of the animal,
and that has to do with the marbling of the fat
in the piece of meat.
So this is an expensive piece of meat,
but usually it's served for a celebration,
and it serves a lot of people,
so it's worth putting the time
and effort in so that you get this right.
[upbeat music]
The only prep I'm really gonna do to this roast right now
is what some people call a dry brine.
Basically, I'm just gonna salt the meat,
put it on a rack,
leave it uncovered in the fridge overnight.
It's gonna kind of tighten up the meat a little.
It's gonna give us a little flavor,
and it's gonna help us get a juicier end product.
Some people with this cut of meat
will take this fat cap off.
They'll cut back to the bones,
where they French it.
I like it kind of au naturel, right?
I leave the fat on.
There's like some bits and pieces here
that I think are tasty,
and this fat cap does shrink up a little,
but I like fat.
The fat kinda drips onto my roast,
adds some fat to the pan.
So the fat kind of equals flavor here,
and I don't wanna trim that off.
Don't be afraid to ask your butcher
to dress this prime rib the way you want it.
I like five bones, fat cap on, minimal trimming.
I want the rack on there,
so that air can travel underneath this,
so when it sits in the fridge,
I'm getting airflow around it.
I'm not necessarily dry aging,
but that's kind of the idea,
is to dry it out just a little.
So what I'm gonna do now is I'm not gonna be shy
with the salt.
I'm gonna season up that fatty area really well,
and I'm gonna rub it in.
I'm gonna rub it into the sides as well.
I'm gonna get the bottom here,
but I'm using a fair amount of salt.
I'm not being shy, but get it on there.
And the part of the reason why I lay the salt on thick here
is that we're only seasoning the outside
of this piece of meat.
Once I cut into this, there's no seasoning in the middle.
So having that nice salty exterior, salty crust,
is going to season our meat really well.
This piece of meat is about 13 pounds.
This is probably more than enough for six to eight people.
So what I like to look for
is that the red meat in here has a lot of fat
or a nice intramuscular fat.
There's a nice bit of fat running through.
This also has our bones in here,
and I like to leave the bone in
because usually when there's bone there,
it helps protect the meat.
You get a juicier product in the end.
So that's all the pre-prep I really do.
Putting this in the fridge salted
for 12 to 24 hours helps season the meat,
it dries it out a little and helps concentrate the flavors,
and at the end of the day,
it gives us a nicer finished piece of prime rib.
So I'm gonna go throw this in the fridge,
and while it's sitting in the fridge,
I can prepare my mirepoix.
[upbeat music]
Here I have celery, carrots, onions,
which is basically a mirepoix.
Mirepoix is usually the flavor base for soups and stocks.
I also have a little garlic, parsley, bay leaf, and thyme.
We're gonna add this to the base of our pan,
so that we can make a really nice jus sauce
or a jus once our prime rib is cooked.
Au jus is basically just the juices
that are seasoned and strained
and served with a piece of meat.
A gravy is usually the same thing,
but it's thickened,
so I'm not gonna thicken it at all.
Turn your oven onto 250 and preheat it.
We're just gonna basically throw everything in the pan.
I have a half a bunch of parsley.
I have some fresh thyme,
a couple of bay leaves.
I have some stalks of celery,
and I cut them really large
because this is gonna roast for a long time,
and if it was really small, it would burn.
Large celery will not burn.
Same thing goes with my carrots,
and I'm just gonna cut big chunks.
Garlic heads, just cut 'em in half.
Just cut 'em in half, skin and all.
Again, this all gets strained out later on.
And then onions, I leave the skin on,
so that all goes into the pan,
and now we're ready to put our roast on top of this.
The pan I'm using is a nice roasting pan.
It's got two really sturdy handles.
It's got fairly high sides.
It's built for roasting meat.
The high sides allow us to have a little juice collection.
It also holds some of the heat in the bottom of the pan.
So this is really great for making gravies
and jus at the end of roasting.
So if you can't afford a roasting pan,
you can always buy one of those aluminum pans at the store.
The prime rib's been in the fridge for about 24 hours.
What I'm gonna do is I'm gonna take it out
and let it sit at room temperature
for about 30 to 60 minutes,
and you don't wanna go any longer than that.
We just wanna kind of bring it closer
to room temperature before we throw it in the oven.
Then, we're gonna get our piece of meat.
I'm gonna put it on top of my veg.
You see how it sits nice and up?
And I'm just gonna season it up a little more,
and I know that there's salt on there already,
but again, we wanna get that nice salty crust,
and I always start out with a little bit of oil.
And basically what the oil does
is that it's not really gonna add fat.
It's just gonna let us get that salt and pepper stick.
So I wanna go again generously with this.
Get it on the back of the piece of meat.
Don't be afraid.
We're gonna use a fair amount of salt.
A little pepper.
Right, we wanna go get the pepper on there.
And then I have some chopped garlic.
I don't use a lot of chopped garlic, just a little.
This is just gonna help flavor that crust,
and I'm just gonna kind of pat that garlic in.
I'm not gonna go too crazy with it.
Just put a little garlic in there,
so we get a little like flavoring in our crust.
Because at the end of the day, yes, I'm gonna eat the meat,
but this crust piece
is probably like one of my favorite pieces.
I want that to be flavored really well.
So now that the roast is prepared, it's time to cook it.
[upbeat music]
So the roast is ready to go into the oven,
and I'm gonna do the reverse sear.
I'm gonna put it in the oven at about 250 degrees Fahrenheit
for about three to 3 1/2 hours, maybe four,
and then I'm gonna crank it up to 500
for about 10 to 15 minutes,
just to get that outside super crispy.
The benefit of this technique
is that you're gonna get a nice rosy pink piece of steak,
and you're not gonna have like that gray ring
on the outside.
A lot of times, if you start high and then go low,
you get a little bit of an overcooked gray ring
on the inside of the meat.
I want my finished roast to be medium rare, medium.
I don't really like my meat super rare.
I feel like it kind of tastes a little rubbery.
I like to rotate my pan halfway
through the cooking 180 degrees,
just to make sure I get an even roast.
We're gonna let it go for a while
until it's cooked most of the way through,
and then we're gonna crank it up
and get it really brown and crispy on the outside.
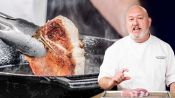
Alright, that's been in for about 3 1/2 hours,
and you can see we got a nice crust on top.
It's nice and brown on the outside.
I just wanna pick it up
and eat it right now like it's a big apple,
but we have to let it rest.
But resting lets the juices redistribute
through the piece of meat.
If we cut it right now, it's gonna just, juices everywhere.
It's gonna be a complete mess.
I'm gonna put it on a rack,
so that it doesn't sit in its own juices.
It's raised from its juices.
Any juices that run off from this, I can put into my jus.
So I'm just gonna get a fork underneath,
try not to burn myself,
and then I have a piece of foil
that I'm just gonna kind of tent over it lightly.
I'm not gonna wrap it tight,
but I'm just gonna try
and keep some of that heat in there.
We're just gonna let that sit there,
let it rest for about 25 to 30 minutes,
and then we can make our jus in the pan.
[upbeat music]
We got a lot of beef juice collected here.
Our vegetables are really nicely roasted.
They're gonna be nice and sweet.
We got some caramelization,
and that's exactly what we want for our jus.
I'm just gonna add some beef broth or beef stock to it,
and then we can throw this on the fire and let it cook.
So I have my roasting pan on the stove.
It has all of my drippings.
It has the beef stock and my veggies,
and all I'm really gonna do is let this come to a boil,
get all the brown bits off of the bottom of the pan,
and that's basically deglazing the pan,
that has all that nice caramelized juices from the steak.
I'm gonna let this cook for about three to five minutes.
I'll strain it, and then we'll season it up.
Alright, this looks like it's about ready to strain.
I'm gonna shut it off.
I like to strain into a pot
because if I strain into a bowl
or some other vessel,
I have to put it in a pot to rewarm it,
so why not strain directly into a pot?
So I'm just gonna strain it.
Get all the juice out.
I don't mind a little fat.
The fat is delicious.
So a lot of people ask me,
What do you do with the veggies afterwards?
We've extracted the flavor.
They're no longer of use to us.
Just throw 'em in the compost bin.
All I really have to do with my jus right now
is season it up.
I'm gonna put some fresh cracked black pepper.
I'm gonna hit it with some salt.
Right, season it up.
We want this to be seasoned really well.
I have a tasting spoon.
I'm gonna give it a taste.
Mm, delicious.
It's meaty, it's brothy,
and it's gonna be a great accent
to that nice slab of medium rare meat.
The jus is good to go.
It's time to serve up our prime rib.
[upbeat music]
Our prime rib has rested for the prerequisite 30 minutes.
I want you to see how beautiful this piece
of meat is, right?
It's nice and springy.
It's got a nice crust on it.
Brown on the outside, looking delicious,
and all we really have to do now is slice this baby.
I'm gonna cut it right down the center.
I like to stand it up,
so that I can see where the joints between the bones are,
so I'm not hitting any bones.
Right.
There we go.
And you guys ready?
Drum roll please.
Look at that.
Juicy, glistening, delicious.
If we didn't let it rest,
right now the cutting board would be full of juice.
What I love about cutting boards like this
is they have this groove on them to collect the juice,
the juice groove or the blood groove.
I think that this is beautifully cooked.
I said I was going medium rare, medium,
and we're right there.
Super juicy.
It's still pink around the outside.
There's no graying on the outside.
This is the reverse sear method.
We get that nice pink all around.
The fat pulled up a little,
and normally people trim this off,
but to me, this is like a crispy treat.
It's got little pieces of meat in it.
The fat is crispy and juicy.
You can actually just put this on a little bit of bread,
and it's just delicious,
and that's why I choose not to take it off.
I can't wait to taste it.
I'm gonna do some really nice big hunks of meat here.
So all the juices on the bottom
of the platter are not blood.
It is basically some water and myoglobin,
which is a protein found in the meat,
and it's just a naturally-occurring thing
when you slice into meat.
It's delicious. Taste it.
Alright, here it is,
my perfectly cooked plate of prime rib.
We've taken all the time to get this right.
Let's give it a taste.
I'm gonna put a little more jus on top.
I have a little bit of horseradish sauce.
I'm gonna just put that on the edge of my plate,
and let's get a piece of this beautiful piece of steak.
I'm gonna go from right here.
Don't get too big of a bite.
Just get it pure with the jus.
[upbeat music]
It's tender. It's juicy.
It's seasoned really well.
The jus is a perfect complement.
What I love about this cook is that it's not too rare.
A lot of times, people cook this too rare,
and it's like really chewy.
It's a perfect, even cook.
I'm really happy with the way this came out.
The texture is beautiful.
The flavor is amazing.
I know that prime rib can be expensive and intimidating,
but you follow these techniques,
you pull this out of the oven and slice it
and serve it to people,
they are going to be impressed.
This is a restaurant-quality dish.
[upbeat music]

The Best Way To Carve A Whole Chicken

The Best Way To Clean and Season a Cast Iron Skillet

The Best Way To Sharpen & Clean Knives (And The Worst)
16 Ways To Peel & Cut Garlic Like A Culinary Instructor

The Best Way To Make French Fries At Home (Restaurant-Quality)

The Best Ways To Cook Bacon (And The Worst)

The Best Way To Fillet A Whole Fish

The Best Ways To Peel & Cut Onions (And The Worst)

The Best Ways To Make An Omelet (French & American)

The Best Way To Make Chicken Stock
The Best Way To Deep Fry Anything

The Incredible New Way to Poach Eggs that NEVER Fails

The Best Way To Make Pasta From Scratch

The 9 Essential Knife Skills To Master
The No-Fail Way To Sear Any Meat Perfectly

The Best Mashed Potatoes You'll Ever Make

Cooking Tips For Kitchen Beginners

The Best Way To Make Perfect Pancakes

How to Make Restaurant-Quality Mac and Cheese at Home

The Best Tomato Sauce You'll Ever Make (Restaurant-Quality)

The Best Salad You'll Ever Make (Restaurant-Quality)

The Best Fried Rice You'll Ever Make (Restaurant-Quality)
The Best Way To Make Sushi At Home (Professional Quality)

The Best Roasted Potatoes You'll Ever Make (Restaurant-Quality)
The Foolproof Way To Make Rice Like A Master Sushi Chef

The Cacio e Pepe Hack That Never Fails (Ft. Binging with Babish)

The Best Pizza You'll Ever Make
The Most Perfect, Silky, Creamy Scrambled Eggs You'll Ever Make

The Best Buffalo Wings You'll Ever Make (Restaurant-Quality)

The Best Tonkatsu You'll Ever Make (Restaurant-Quality)

The Best Chicken Breast You'll Ever Make (Restaurant-Quality)
The Best Grilled Cheese You'll Ever Make

The Best French Toast You'll Ever Make (Restaurant-Quality)
The Best Salmon You'll Ever Make (Restaurant-Quality)

The Best Potato Salad You'll Ever Make (Deli-Quality)
The Five Knives You Need In Your Kitchen (And How To Use Them)

These 5 Sauces Will Upgrade Your Weeknight Meal Game
The Best Pork Chop You'll Ever Make (Restaurant-Quality)

The Best Fried Eggs You’ll Ever Make

The Best Stuffing You’ll Ever Make

The Best Gravy You'll Ever Make

The Best Chilaquiles You’ll Ever Make (Restaurant-Quality)

The Best Guacamole You’ll Ever Make (Restaurant-Quality)

The Best Chocolate Cookies You’ll Ever Make

The Best Mexican Rice and Beans You’ll Ever Make

The Best Mexican Chicken Tacos You’ll Ever Make

The Best Sandwich You’ll Ever Make (Deli-Quality)

The Best Lasagna You'll Ever Make (Restaurant-Quality)

The Best Ways to Reheat Leftover Pizza (And the Worst)

The Best Queso You'll Ever Make is Queso Fundido

The Best Tortillas You Can Make at Home

The Best Salsa You'll Ever Make

The Best Pasta Carbonara You'll Ever Make (Restaurant-Quality)

The Best Fried Chicken You'll Ever Make
These 3 Dressings Will Upgrade Any Salad

The Michelin-Star Way to Make Salmon at Home

How to Make the Perfect Biscuits at Home

The Best Hamburger You'll Ever Make

These 3 Dips Will Level Up Any Dinner Party

The Best Steak You'll Ever Make (Restaurant-Quality)

The Best Grilled Chicken You'll Ever Make (Restaurant-Quality)

The Secret to Perfect Boiled Eggs (Soft, Jammy, Hard)

5 Garlic Techniques That Will Up Your Game

The Best Spaghetti and Meatballs You'll Ever Make (Restaurant-Quality)

The Best Pasta Bolognese You'll Ever Make (Restaurant-Quality)

The Best Prime Rib You’ll Ever Make (Restaurant-Quality)

The Best Fettuccine Alfredo You’ll Ever Make (Restaurant-Quality)

The Best Chocolate Chip Cookies You’ll Ever Make (Bakery-Quality)

The Best Brownies You'll Ever Make (Bakery-Quality)

The Best Chili You’ll Ever Make (Restaurant-Quality)

The Best Roast Chicken You’ll Ever Make (Restaurant-Quality)

The 6 Rules of Plating Used in Restaurants | Epicurious 101

The Best Way to Clean and Season a Wok

Why Stir Fry is Better in Restaurants (And How to Do It At Home)
Why Steaming is Better for Your Food (And How to Do It At Home)

The Best Mac and Cheese You'll Ever Make (Restaurant-Quality)