- Epicurious 101
- Season 1
- Episode 57
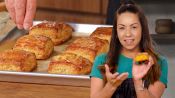
How to Make the Perfect Biscuits at Home
Check out Adrienne's Flaky Layered Biscuit recipe!
Yield: serves 4-8
Ingredients:
2 cups (4 sticks) unsalted butter, frozen
2 cups (280g) all-purpose flour, plus more for dusting
2 cups (240g) Wondra Flour
¼ cup (50g) granulated sugar
4 tsp. Baking powder
1 tsp. Baking soda
2 ½ tsp. Kosher salt
2 cups buttermilk, chilled
2 Tbsp. unsalted butter, softened to room temperature
2 Tbsp. Honey
Flaky Sea Salt
Preparation:
Making biscuits: Grate the butter on the large holes of a box grater or with the shredding disk of a food processor. Transfer to a freezer-safe container and freeze or refrigerate before proceeding.
In a large bowl, mix the all-purpose flour, Wondra, granulated sugar, baking powder, baking soda, and salt to combine. Add the frozen butter and toss with your fingers to make sure each piece is coated well (work quickly so that the butter doesn’t warm up too much!). With a silicone spatula, fold in the buttermilk until just combined.
Turn the dough out onto a lightly floured piece of parchment paper, wax paper or foil (it will help with moving it around later). Gently press and pat the dough together and roll it out to an even rectangle about 12 x 18 inches. Transfer the dough on the parchment to a baking sheet and refrigerate for 15 minutes.
Slide the parchment paper and dough back onto a flat work surface with the long side closest to you. Lightly dust the top of the dough with a pinch of flour, then fold the two short sides into the center until they are touching )like a set of double doors), and then fold the left side on top of the right (like a closed book).
Center the folded dough on your parchment paper and roll the dough out to 12 x 18-inch rectangle, again rubbing flour on your rolling pin if the dough sticks. Repeat the book folds again, then roll the dough this time to a 12-inch square. Transfer the dough back to the baking sheet and refrigerate for 20 minutes.
Preheat the oven to 425 F with a rack in the center position. Slide the dough back onto your work surface and use a sharp knife to cut the dough into approximately 2-inch squares. Line the baking sheet with a new piece of parchment paper and line up the biscuit dough squares on the baking sheet, spaced about an inch apart. Return the sheet to the refrigerator and chill the biscuits for another 10 minutes before baking.
Place the baking sheet on the center rack and bake for about 20 minutes, rotating once halfway through, until the biscuits are puffed and deeply golden.
In a small bowl, whisk the softened butter and honey. Remove the biscuits from the oven and brush with honey butter. Sprinkle with flaky sea salt.
Let cool.
Released on 07/23/2024
Hi, I'm Adrienne Cheatham.
I'm a professional chef,
and today, I'm gonna show you
how to make the best biscuits at home.
We are talking crispy, fluffy, airy, delicious,
and not those lifeless pale blobs of dough.
This is biscuits 101.
To me, the perfect biscuit
is like croissants thicker cousin.
It's denser and thicker on the inside,
but it still has that beautiful shattering crust
on the outside.
There are very few ingredients, very few steps.
It's just a matter of the technique
that you use to make them.
[graphics whooshing] [chill music]
[logo thudding]
The most important thing when you're making biscuits
is keep it cold.
Keep your fat as cold as possible
so it doesn't melt and soak into the flour
and make your biscuits heavy.
The first thing we're gonna do
is grate butter on a box grater.
You can't grape butter once it's soft,
so it's best to just throw it in the freezer
the night before.
[butter thudding]
It is rock hard.
You do wanna work quickly
so you don't let your butter heat up.
Another important part of why we keep the butter so cold
is because we're baking our biscuits at 425.
You don't wanna give the butter a chance to slowly melt
while it's starting to bake.
You wanna shock it with heat
so that right away,
the water content of the butter evaporates
and that's what gives you the lift inside the biscuits.
I'm using the large holes on the box grater
because I want big, flat, long pieces of butter.
They really give you a more defined pocket of air
in your biscuits.
The butter is grated.
I'm gonna pop it in the freezer
so it stays really, really cold.
So now I'm gonna mix all of my dry ingredients.
All-purpose flour, regular, degular ass flour,
same that you'll get anywhere.
Wondra flour.
The cool thing about wondra flour
is that it is a pre-gelatinized starch.
That means the starch has actually been kind of cooked,
so starch molecules swell up
and this flour has been cooked so that it swells up
and then they stop that process.
So it's better to mix with cold ingredients.
It also takes shorter of a cooking process
because you don't have to go through the whole swelling
and cooking of the starch molecule,
and it has a little bit lower protein,
which means lower gluten, which means your biscuits
will be a little fluffier and lighter
because you don't have as many of the gluten strands
giving you that chew
that you would get using all-AP flour.
Sugar. You need a little bit of dimension and flavor.
So salt and sugar kind of balance that out.
It also helps with the browning process
when the biscuits are baking later.
Baking powder and baking soda.
We're using two leavening agents
to get maximum lift in these biscuits.
I do like to use a whisk with the dry ingredients
because it just really helps get everything incorporated
and dispersed very thoroughly.
Now we add our frozen butter.
I am just going to toss with the flour
in the dry ingredients
because I really want each little shard of butter
to be coated in the flour mixture.
So that way, we have these beautiful
little individual pieces of butter
that will give us such nice flavor
and such nice lift in our biscuits.
So I'm just lifting from the bottom
and letting the butter and flour fall through my fingers.
I'm not pressing it or packing it.
So this is how it should look.
You wanna see these beautiful little curls of butter
coated thoroughly in the dry ingredients.
This will also help keep them separate
when we add our wet ingredients.
It's kind of like breading a piece of chicken to fry it.
It'll have its own little coating
so that way, it'll stay separate from everything else.
You don't need to overwork this.
You just wanna do it a few times
until you see all the butter is coated
and you should be good to move on to the next step.
So buttermilk is a little bit acidic.
It gives you a nice tangy flavor.
We have a lot of fat in the dough with the butter,
so the buttermilk will provide us
with a little bit of tart tanginess
to kind of balance out the flavor of the biscuit.
So at this point, I am using a spatula.
I don't wanna get in there with my hands
because it'll take me so long
to clean everything off my hands
that I will warm up the butter in the process.
I'm just barely folding everything together
with this silicone spatula,
going around the edge and folding it through
just to kind of disperse the buttermilk
into the ingredients.
[graphics whooshing] [chill music]
[logo thudding]
I have a piece of parchment paper here on the board,
on the work surface
because I don't wanna touch the dough too much.
So putting the parchment paper down
and adding the ingredients in
to press it into a rectangle
will help me move it to put it into the refrigerator
without having to, like, fumble it and mess it all up
once I've made this nice rectangle.
So the ingredients are still very separate-ish.
Buttermilk will slowly hydrate the flour,
but you don't wanna start with a dough that's too wet.
I'm not really kneading it.
We wanna keep it in these nice shards
that are just barely coated in flour
and just barely held together with buttermilk.
Now this part does get dangerous.
My hot hands are touching this dough,
so I'm working quickly just to form it into a rectangle.
I'm just barely pressing everything together.
If you feel it getting sticky,
you can just put a little flour on your hands
and I'm just going to kind of guide it with one hand
and make a nice clean edge with the other.
Boom. There we go.
Now I'm gonna transfer this to a sheet tray with the paper.
All I have to do is pull it
and this is gonna go back into the refrigerator
to stay nice and cold.
This dough is so pretty.
This is kind of the fun part.
But again, you have to work fast
because you want to keep this cold.
Cold is key.
I kind of like to use the croissant method
where you make a book fold.
The main point is that you're creating layer.
Take one side and fold it into the center.
Take the other side and fold it into the center
so that they're meeting in the middle.
Now I'm gonna fold it over onto itself.
So I have four layers here.
If I were in like a super fine dining restaurant,
maybe I would have to clean up the edges a little bit,
but I kind of like it like this.
I'm just gonna give it a little bit more flour
just to keep the butter from sticking.
And I'm going to rotate it
because now we're gonna roll it back into a rectangle
that was about the same size.
We're going for about 12 to 18 inches.
Doesn't have to be perfect. Don't worry.
Don't bust out the measuring tape.
The only real way to mess this up is to let it get too hot.
So if your kitchen is really hot, work a little faster,
and just pop it back in the fridge if you need to.
It's really coming together.
The buttermilk is hydrating all of the ingredients.
We're gonna do the fold one more time.
I can feel my dough getting soft,
which means it is getting a little bit warm.
So I'm gonna work pretty quickly here,
and this is gonna be the last time that I roll this out.
[hands thudding]
[parchment paper rustling]
So I'm just gonna flip it.
You see the front here, you can see the layers,
and there's more layers on the inside
that have just been rolled out.
This is really gonna help us get nice lift
and nice definition.
More folds mean more layers,
which means more flakiness in your biscuit,
but if you're sacrificing cold for layers,
it's not worth it.
I've really found that twice is kind of the sweet spot
between getting the lift and the layers that I want,
but also keeping the identity and integrity
of what a biscuit should be.
I have the dough in a square.
We don't need to do the rectangle again.
Lift this up, put it back on the tray,
and get it cold for about 20 minutes in the fridge
until we cut and bake.
[graphics whooshing] [chill music]
[logo thudding]
Booya. Look at that beautiful biscuit dough.
It is amazing.
You can use a biscuit cutter, you can use a glass.
However, a lot of them are not sharp enough,
so they pinch the dough as you're cutting down.
It won't let the dough rise.
It'll kind of like squish it down on the sides.
You also get waste cutting circles out of a square.
So I'm gonna cut this into about two inches
and I'm using a sharp knife
so that way, it doesn't pinch the dough.
It just goes straight down.
So I particularly love cutting my biscuits into squares
because I don't know about you,
but I love, like, the corners of lasagna.
I like all those crispy edges and the browning and all that.
So I like doing square biscuits
because you get those corners that are a little crunchier.
You get all the sides and everybody gets that goodness.
So transfer these beautiful biscuits
to a parchment line baking tray about an inch apart.
I want to keep this cold.
If they feel like they are warming up,
go ahead and pop them in the fridge or the freezer.
Take care of the rest of your biscuits
and then go ahead and bake.
We're starting at 425
and it's best if you have a convection oven to turn that on
because you really want the air to circulate
and be even so you don't get hotspots in your oven
where the butter melts on some,
but really puffs on the others.
Now we will get these in the oven.
Your biscuits should take about 20 minutes,
but if your oven is really powerful,
your convection fan is blowing like crazy,
it might be closer to 15 minutes, it might be longer to 25.
So just keep an eye on it.
When you start to smell them,
that's when you know you're getting close.
When they have that beautiful golden crust,
go ahead and pull 'em out.
One thing you do not want to do
is open your oven door to check.
The temperature dropping will stop that rising process
and it'll collapse.
[graphics whooshing] [chill music]
[logo thudding]
Bonus points.
We're gonna make a little bit of honey butter
to brush onto our biscuits.
Totally optional.
I'm using two tablespoons of butter,
about two tablespoons of honey.
Don't get me wrong, the biscuits are delicious on their own,
but adding the honey butter on top
gives it another, like, dimension of depth of flavor.
A sweetness to offset the saltiness.
This butter is just nice, soft at room temperature
and you can see they just stir together really nicely.
This is perfect.
You don't want it to be too cold
because you won't be able to get the brush in there
to get it on top of the biscuits,
and you don't want it to be too soft
because then it's melted and the fat
and the liquid in the butter separate.
So this is still fully emulsified, homogenous.
You'll get nice even coating on your biscuits.
This is exactly where you want it to be.
[graphics whooshing] [chill music]
[logo thudding]
The moment we have all been waiting for.
A lot of people will pull the biscuits
a little bit too early
while they're still a little bit blonde.
I like my biscuits to be just past that golden brown
and go a little bit deeper
because you're really getting more depth of flavor,
you're getting more caramelization,
you're getting crispier corners,
and you're also setting those layers in between.
So while they are still hot,
I'm gonna brush some of this honey butter on them
to kind of glaze the tops of these beautiful biscuits.
So on top of the honey butter,
just a little bit of flaky sea salt.
You get crunch from the salt.
You also get these little pops of salinity
that contrast so nicely
with the honey butter brushed on top.
This is how you show somebody you really care.
Okay, hurry up and cool down so I can eat you.
We are going to plate them.
How do you like that?
What if I gave you like a pyramid of biscuits,
would you be happy?
You could see how the bottom is not burned,
but it is deeply golden and crusty.
So we're gonna get a lot of texture from all of this
and a lot of flavor from everything that we put into it.
[biscuit crunching]
Oh, my God.
You get a little bit of the tang from the buttermilk,
You get sweetness.
You get a little bit of seasoned like saltiness
to balance that out.
But above all, you get this soft, fluffy interior
and this absolutely amazing crunch on the outside.
Making biscuits can seem a little daunting at first,
but it is very simple.
So if you just pay attention to the details
and a couple little tricks and tips
and just follow them,
you will have an amazing outcome every time.

The Best Way To Carve A Whole Chicken

The Best Way To Clean and Season a Cast Iron Skillet

The Best Way To Sharpen & Clean Knives (And The Worst)
16 Ways To Peel & Cut Garlic Like A Culinary Instructor

The Best Way To Make French Fries At Home (Restaurant-Quality)

The Best Ways To Cook Bacon (And The Worst)

The Best Way To Fillet A Whole Fish

The Best Ways To Peel & Cut Onions (And The Worst)

The Best Ways To Make An Omelet (French & American)

The Best Way To Make Chicken Stock

The Best Way To Deep Fry Anything

The Incredible New Way to Poach Eggs that NEVER Fails

The Best Way To Make Pasta From Scratch
The 9 Essential Knife Skills To Master

The No-Fail Way To Sear Any Meat Perfectly
The Best Mashed Potatoes You'll Ever Make

Cooking Tips For Kitchen Beginners

The Best Way To Make Perfect Pancakes

How to Make Restaurant-Quality Mac and Cheese at Home

The Best Tomato Sauce You'll Ever Make (Restaurant-Quality)

The Best Salad You'll Ever Make (Restaurant-Quality)

The Best Fried Rice You'll Ever Make (Restaurant-Quality)
The Best Way To Make Sushi At Home (Professional Quality)

The Best Roasted Potatoes You'll Ever Make (Restaurant-Quality)
The Foolproof Way To Make Rice Like A Master Sushi Chef

The Cacio e Pepe Hack That Never Fails (Ft. Binging with Babish)

The Best Pizza You'll Ever Make

The Most Perfect, Silky, Creamy Scrambled Eggs You'll Ever Make

The Best Buffalo Wings You'll Ever Make (Restaurant-Quality)

The Best Tonkatsu You'll Ever Make (Restaurant-Quality)

The Best Chicken Breast You'll Ever Make (Restaurant-Quality)

The Best Grilled Cheese You'll Ever Make

The Best French Toast You'll Ever Make (Restaurant-Quality)

The Best Salmon You'll Ever Make (Restaurant-Quality)

The Best Potato Salad You'll Ever Make (Deli-Quality)

The Five Knives You Need In Your Kitchen (And How To Use Them)

These 5 Sauces Will Upgrade Your Weeknight Meal Game

The Best Pork Chop You'll Ever Make (Restaurant-Quality)

The Best Fried Eggs You’ll Ever Make

The Best Stuffing You’ll Ever Make

The Best Gravy You'll Ever Make

The Best Chilaquiles You’ll Ever Make (Restaurant-Quality)

The Best Guacamole You’ll Ever Make (Restaurant-Quality)

The Best Chocolate Cookies You’ll Ever Make

The Best Mexican Rice and Beans You’ll Ever Make

The Best Mexican Chicken Tacos You’ll Ever Make

The Best Sandwich You’ll Ever Make (Deli-Quality)

The Best Lasagna You'll Ever Make (Restaurant-Quality)

The Best Ways to Reheat Leftover Pizza (And the Worst)

The Best Queso You'll Ever Make is Queso Fundido

The Best Tortillas You Can Make at Home

The Best Salsa You'll Ever Make

The Best Pasta Carbonara You'll Ever Make (Restaurant-Quality)

The Best Fried Chicken You'll Ever Make
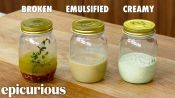
These 3 Dressings Will Upgrade Any Salad

The Michelin-Star Way to Make Salmon at Home
How to Make the Perfect Biscuits at Home

The Best Hamburger You'll Ever Make

These 3 Dips Will Level Up Any Dinner Party

The Best Steak You'll Ever Make (Restaurant-Quality)

The Best Grilled Chicken You'll Ever Make (Restaurant-Quality)

The Secret to Perfect Boiled Eggs (Soft, Jammy, Hard)

5 Garlic Techniques That Will Up Your Game

The Best Spaghetti and Meatballs You'll Ever Make (Restaurant-Quality)

The Best Pasta Bolognese You'll Ever Make (Restaurant-Quality)

The Best Prime Rib You’ll Ever Make (Restaurant-Quality)

The Best Fettuccine Alfredo You’ll Ever Make (Restaurant-Quality)
The Best Chocolate Chip Cookies You’ll Ever Make (Bakery-Quality)

The Best Brownies You'll Ever Make (Bakery-Quality)

The Best Chili You’ll Ever Make (Restaurant-Quality)

The Best Roast Chicken You’ll Ever Make (Restaurant-Quality)

The 6 Rules of Plating Used in Restaurants | Epicurious 101

The Best Way to Clean and Season a Wok

Why Stir Fry is Better in Restaurants (And How to Do It At Home)

Why Steaming is Better for Your Food (And How to Do It At Home)

The Best Mac and Cheese You'll Ever Make (Restaurant-Quality)