- Epicurious 101
- Season 1
- Episode 70
The Best Chili You’ll Ever Make (Restaurant-Quality)
Released on 01/22/2025
Hi, I'm Ann Ziata,
Professional Chef and Culinary Instructor,
and today I'm gonna show you
the best way to make homemade chili.
We'll be going over techniques the pros use
to make a perfect bowl of chili.
This is Chili 101.
[lively upbeat music]
There's so many great versions of chili out there.
Today we are making a classic beef and bean chili.
Making your own chili from scratch is gonna be better
than anything store bought, anything pre-made.
It's just gonna taste really fresh
and the spices are gonna be really bright and flavorful.
[upbeat clapping]
[drum beating]
Most recipes will call for a chili powder,
which is basically a blend of different spices
that's been premixed and you can get it in stores.
They're not nearly as bright and aromatic
as something you can make at home.
Our first step is to toast
some of our spices that are whole.
Heat is usually where a lot of food's flavor
really develops and comes out.
We're gonna start with a hot dry pan.
I'm not adding any oil, I'm not adding any water,
and I don't wanna dissolve any of the flavors.
I just want them to be concentrated in the seed.
I'm gonna lower it just to a medium.
It's gonna cook very quickly and I don't wanna burn it.
So I'm gonna add two teaspoons of cumin seed.
We're just kind of bringing those flavor compounds
into the oils of the seed
and just getting them alive and active.
So, I'm gonna keep this moving.
It'll just become a little bit darker,
a little bit more toasty, and it will smell really aromatic.
It's starting to smell really strong,
and I can even hear it sounds different.
A little kind of squeaky when it moves around the pan.
I don't wanna grind it right away
because it's going to come out a little bit kind of mushy.
Right now, the fats and the flavors
are really active and excited.
So we're gonna bring it down to room temperature
just so they relax a little bit,
so the texture comes out really nice.
So, let's toast the coriander seeds.
We're gonna do one teaspoon.
Okay, starting to smell really nice and floral.
If you can start to see some caramelization happening,
we're ready.
Now we can grind our cumin.
So, I have a mortar and pestle here.
You can also use a spice grinder or even a coffee grinder.
Just make sure it's nice and clean and dry.
And just give it a few pulses until it's nicely ground.
It's gonna press the seeds down and run it in circles.
Now, I can smell it like 20 times more than before.
It smells wildly better than anything pre-ground
you would get at the store.
This looks lovely.
Now, let's do the same with the coriander.
Gonna crush them up.
It smells nice and warm and citrusy.
This is perfect.
I am using Mexican oregano here.
Mexican oregano is a little more citrusy
and it's just very refreshing and delicious.
If you're using Italian oregano, you can skip this step.
But these leaves are a little bit larger
and I'm just gonna break them up a little
and I can smell them already.
And we are done grinding.
So, let's finish our spice blend.
Paprika, I would say,
it still has a nice kinda sweet peppery aroma.
It's basically from dried red peppers.
There's no heat or spiciness to it,
but you still get a little bit
of that smoky, sweet, peppery flavor.
So, because it is one of the more mild spices,
we can use a large amount.
So we're gonna use one tablespoon,
and if it's not exact, that's okay.
Add a teaspoon of smoked paprika.
So, smoked paprika has a pretty strong smoky flavor.
Cayenne pepper.
This is the first pepper that we're adding
that is a little spicy,
but it's not gonna destroy your palate.
I'm gonna do a little less than a quarter teaspoon.
And then, we're gonna add some black pepper.
It's gonna be about a quarter teaspoon.
And whisk it together.
Our chili powder's ready.
Let's make our chili.
[upbeat clapping]
[drum beating]
So, I have everything already cut before I start cooking.
So, I'm using a Dutch oven here.
So, this is a ceramic-coated cast iron pot,
which means it's going to hold heat incredibly well.
It's going to distribute the heat nice and evenly.
If you don't have a Dutch oven,
you can use another thick pot,
especially one with a thick bottom.
So, I'm gonna start by preheating my Dutch oven
at medium high just to get it hot.
And then, I'm probably gonna lower it into medium.
First thing we wanna do is to get all
of our aromatic ingredients sweated and come to life.
This feels nice and hot.
I'm gonna add a few tablespoons of olive oil.
Just enough to barely cover the bottom of the pan.
Onion.
So, I don't wanna caramelize the onions here.
Salt is gonna draw out moisture in the onions,
which is gonna help it sweat.
It usually takes about five to seven minutes or so.
And now we're ready to add our garlic.
Minced garlic, but not a garlic paste.
We still wanna be able to see the pieces in there.
And garlic cooks very quickly.
So once we add it, give it a minute.
We just want the garlic to become aromatic.
We don't wanna burn it.
So we have red bell peppers here diced up.
And we have a little jalapeno.
This is gonna add a heat, but nothing insane.
The seeds have been removed
and it's just the outside flesh that we cut up.
Some jalapenos are spicier than other jalapenos.
You can taste it first before you add it
just to see what you're gonna get.
But I like to make life exciting.
So, this is our little sofrito here.
Sofrito is a type of mirepoix,
in that it's gonna be the aromatic base.
I want the peppers to look just a little cooked,
almost like sauteed.
A little tender, a little glossy, and shiny.
So, I wanna make sure all of my aromatic ingredients are hot
before I add the chili powder.
Because the chili powder, it needs to touch a hot surface
in order for the flavors to come out.
If I were to put them first in the pan before anything else,
they would burn.
But here we're gonna get a nice heat
where they can bloom and develop their flavors.
And this is hotter
than when we add our wet ingredients, right?
Anything like tomatoes or stock, anything with water in it.
Water can only get up to like 212 degrees
and that's the highest it's gonna go
before it turns into vapor.
Whereas oil can get a lot hotter, right?
300 or so degrees.
So we wanna add this
before we add anything with water in it.
So, let's add our chili powder.
So, we wanna be sure we don't burn the chili powder,
so we should have enough food in there,
enough moisture in there to keep it from burning.
If there's a little bit of caramelization at the bottom,
you can use a little vegetable stock
or even white wine to deglaze.
So, our tomato paste is gonna go in next.
Some recipes call for tomato sauce,
but I would way recommend using tomato paste.
It's much more concentrated, it's deeper.
You get more of that umami flavor
that's just naturally inherent in tomatoes.
Brown the tomato paste.
And we're gonna get it a little bit deeper in color.
So I have meat here.
And I'm gonna go right ahead and break it up
so it cooks nice and evenly.
I'm using ground beef in this recipe,
but you can use ground turkey, you can use even chicken,
or you can make it vegetarian
and just use a few different types of beans.
I'm adding the beef now
because it's gonna make the temperature drop,
and I'm adding it after all the spices have bloomed, right?
The pan is the hottest it's ever gonna be,
and now it's gonna get a little cooler.
So now, we can start to brown the beef,
which we need to cook it, right?
We don't want it raw.
We're gonna get some caramelization,
the Maillard reaction in the beef.
So, the beef itself is gonna lend,
of course, a ton of flavor to the dish too.
But now we get to season it.
Take your time with this step
to make sure you do get that nice browning on the meat
before we add any water to the dish.
Once we add water, we have lost our window of opportunity.
I'm using red kidney beans.
They hold their shape really well.
They have a delicious kind of meaty flavor.
So, they're my bean of choice,
but you can absolutely use white beans, black beans,
even black eyed peas are great too.
I'm gonna add some fire-roasted tomatoes.
They're gonna add sweetness,
they're gonna add body, a little brightness and acidity.
That's another strong base of this chili.
And lastly, add your beef stock.
If you're making this with turkey or chicken,
you can use chicken stock or you can even use beer too.
Give it a little gentle mix.
So, we can see it's starting to come to a low boil.
Leave it on a simmer for 30 minutes and we're good to go.
[upbeat clapping]
[drum beating]
So before you plate, taste it for salt and for heat
and make sure everything is exactly where you want it.
And now we can plate.
Sour cream is gonna help cut some of the spiciness
so it provides a little cooling relief
and a really lovely contrast.
Cheddar cheese also adds some richness.
And who doesn't love cheese?
Fresh cilantro, some scallions, tortilla chips.
It is comfort food after all, and who doesn't love a chip?
And then some fresh squeezes of lime on the side
to add some brightness, freshness,
and a little acidity to the dish.
And that is how you make the perfect bowl of chili.
Chili tastes best when it is made at home.
We want your home to be filling with the aroma.
We want it to be simmering on your stove.
And it's so easy to make in one pot too.
You won't get the whole kitchen messy.
Most importantly, don't stress out
'cause chili should be chill.
Feel free to double or triple the recipe,
make a big pot of it, and freeze some for later.

The Best Way To Carve A Whole Chicken

The Best Way To Clean and Season a Cast Iron Skillet

The Best Way To Sharpen & Clean Knives (And The Worst)
16 Ways To Peel & Cut Garlic Like A Culinary Instructor

The Best Way To Make French Fries At Home (Restaurant-Quality)

The Best Ways To Cook Bacon (And The Worst)

The Best Way To Fillet A Whole Fish

The Best Ways To Peel & Cut Onions (And The Worst)

The Best Ways To Make An Omelet (French & American)

The Best Way To Make Chicken Stock

The Best Way To Deep Fry Anything

The Incredible New Way to Poach Eggs that NEVER Fails

The Best Way To Make Pasta From Scratch

The 9 Essential Knife Skills To Master

The No-Fail Way To Sear Any Meat Perfectly

The Best Mashed Potatoes You'll Ever Make

Cooking Tips For Kitchen Beginners

The Best Way To Make Perfect Pancakes

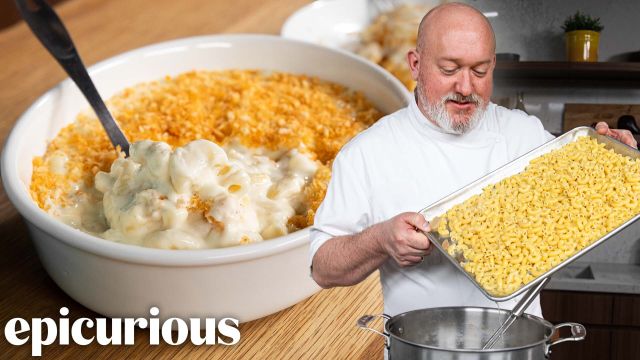
How to Make Restaurant-Quality Mac and Cheese at Home

The Best Tomato Sauce You'll Ever Make (Restaurant-Quality)

The Best Salad You'll Ever Make (Restaurant-Quality)

The Best Fried Rice You'll Ever Make (Restaurant-Quality)

The Best Way To Make Sushi At Home (Professional Quality)

The Best Roasted Potatoes You'll Ever Make (Restaurant-Quality)

The Foolproof Way To Make Rice Like A Master Sushi Chef

The Cacio e Pepe Hack That Never Fails (Ft. Binging with Babish)

The Best Pizza You'll Ever Make

The Most Perfect, Silky, Creamy Scrambled Eggs You'll Ever Make

The Best Buffalo Wings You'll Ever Make (Restaurant-Quality)

The Best Tonkatsu You'll Ever Make (Restaurant-Quality)

The Best Chicken Breast You'll Ever Make (Restaurant-Quality)

The Best Grilled Cheese You'll Ever Make

The Best French Toast You'll Ever Make (Restaurant-Quality)

The Best Salmon You'll Ever Make (Restaurant-Quality)

The Best Potato Salad You'll Ever Make (Deli-Quality)

The Five Knives You Need In Your Kitchen (And How To Use Them)

These 5 Sauces Will Upgrade Your Weeknight Meal Game

The Best Pork Chop You'll Ever Make (Restaurant-Quality)

The Best Fried Eggs You’ll Ever Make

The Best Stuffing You’ll Ever Make

The Best Gravy You'll Ever Make

The Best Chilaquiles You’ll Ever Make (Restaurant-Quality)

The Best Guacamole You’ll Ever Make (Restaurant-Quality)

The Best Chocolate Cookies You’ll Ever Make

The Best Mexican Rice and Beans You’ll Ever Make

The Best Mexican Chicken Tacos You’ll Ever Make

The Best Sandwich You’ll Ever Make (Deli-Quality)

The Best Lasagna You'll Ever Make (Restaurant-Quality)

The Best Ways to Reheat Leftover Pizza (And the Worst)

The Best Queso You'll Ever Make is Queso Fundido

The Best Tortillas You Can Make at Home

The Best Salsa You'll Ever Make

The Best Pasta Carbonara You'll Ever Make (Restaurant-Quality)

The Best Fried Chicken You'll Ever Make
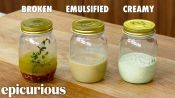
These 3 Dressings Will Upgrade Any Salad

The Michelin-Star Way to Make Salmon at Home

How to Make the Perfect Biscuits at Home

The Best Hamburger You'll Ever Make

These 3 Dips Will Level Up Any Dinner Party

The Best Steak You'll Ever Make (Restaurant-Quality)

The Best Grilled Chicken You'll Ever Make (Restaurant-Quality)

The Secret to Perfect Boiled Eggs (Soft, Jammy, Hard)

5 Garlic Techniques That Will Up Your Game

The Best Spaghetti and Meatballs You'll Ever Make (Restaurant-Quality)

The Best Pasta Bolognese You'll Ever Make (Restaurant-Quality)

The Best Prime Rib You’ll Ever Make (Restaurant-Quality)

The Best Fettuccine Alfredo You’ll Ever Make (Restaurant-Quality)

The Best Chocolate Chip Cookies You’ll Ever Make (Bakery-Quality)

The Best Brownies You'll Ever Make (Bakery-Quality)

The Best Chili You’ll Ever Make (Restaurant-Quality)

The Best Roast Chicken You’ll Ever Make (Restaurant-Quality)

The 6 Rules of Plating Used in Restaurants | Epicurious 101

The Best Way to Clean and Season a Wok

Why Stir Fry is Better in Restaurants (And How to Do It At Home)

Why Steaming is Better for Your Food (And How to Do It At Home)

The Best Mac and Cheese You'll Ever Make (Restaurant-Quality)