- Epicurious 101
- Season 1
- Episode 54
The Best Fried Chicken You'll Ever Make
Released on 06/05/2024
The crunch says everything.
I'm Frank Proto, professional chef and culinary instructor,
and today I'm gonna show you how to make fried chicken.
With my method, you're gonna get crunchy, juicy,
tender chicken that's never dry.
This is Fried Chicken 101.
This might be controversial,
but I like to use boneless chicken thighs.
The thigh has lots of flavor to it, has some fat to it,
and it doesn't dry out that easy
and it gets nice and crisp when you fry it up.
People might say, Chef Frank, why boneless?
In order for it to get a nice crispy crust
and be cooked all the way through,
I like to take the bones out.
I'll bone them myself.
If you like bone-in chicken, this recipe still works.
You just need to cook it a little bit longer.
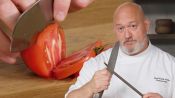
Time to bone out my chicken thighs.
This is a firm boning knife.
What I like to do is get in there alongside the bones,
open it up, pinch under the bone, run my knife through.
Save these for stock. Don't throw 'em away.
Get any cartilage off. Trim off any extra skin.
I do want skin on there, but I don't want a lot of extra.
Cut this in half,
and I just think it's a better portion size.
Now some might argue,
oh, that's just a nugget or a chicken finger,
but chicken fingers and nuggets
are not made with thighs with the skin on.
This is not a nugget. This is not a chicken finger.
I stand by my word.
Okay, my chicken is prepped. Now it's time to make my brine.
A brine is basically a salty solution
that we're gonna marinate our chicken in.
The brine is gonna tenderize, it's gonna add flavor.
It's gonna add some saltiness and seasoning
that's gonna allow our chicken to hold on to moisture.
What I like to do is mix my brine in a bowl
before I put it in my chicken
to make sure all of my ingredients
are distributed really well.
And what I have here is some buttermilk.
Now, buttermilk is a cultured milk.
It has a lot of acidity, it's got some tanginess.
I like to add hot sauce to my mixture as well.
This is Louisiana hot sauce. I think it tastes great.
You can use whatever hot sauce you have.
Garlic powder.
Now you might say, Hey, Chef Frank, you're a fancy chef.
Why are you using garlic powder?
I really think garlic powder
is a great convenience ingredient.
In order to get the punch that this gives,
I'd have to add a lot of fresh garlic.
And I think garlic powder does the job.
Some mustard powder.
Mustard powder might be one of those ingredients
that you're questioning.
I think mustard has a great sharpness to it.
It adds a little spice to this.
This flavor that everyone's like,
I know that flavor, but I'm not sure what you put in here.
And then of course, salt.
This is a brine, so we want a fair amount of salt.
So once I have all these things in the bowl,
just whisk it together so it's combined really nice.
Make sure everything melts,
the salt melts in there and we don't have any big lumps.
Once it's combined, all of this can go right on top.
Make sure the chicken is covered with brine.
So if you have to make a little more, make a little more.
Chicken when you put it in a bowl tends to stick to itself.
So if you don't move it around,
you're gonna have the outside
of these two pieces of chicken brined
and the center with no brine.
So I like to just mix it up
to make sure my chicken gets coated really, really well.
The most important part of the brining process
is to let it sit.
I do at least 12 hours.
Now, if you don't have 12 hours, that's fine,
but if you want to maximize that juiciness
and tenderness of the chicken,
you need at least 12 hours in the fridge.
The chicken has been brining for 12 hours
and now we're gonna drench.
Basically we're taking our wet chicken
and coating it with dry flour.
The whole point of doing this dredge
is that the flour mixture is gonna coat our chicken,
form a nice crispy crust to seal in the moisture
to ensure a juicy fried chicken.
First thing I wanna do is season my dredge.
I'm gonna add about a couple tablespoons of salt here.
If we don't add salt to the dredge,
it's gonna be a little bland.
And then I have some fresh cracked black pepper.
I like using a whisk for dry ingredients.
It distributes things really well.
And then we can just take our chicken out of the brine
and put it right into the dredge.
That brine is kinda sticking. I want that.
That's gonna help my flour stick to those pieces of chicken.
So just drain it lightly. Place them into the flour.
Word of caution here.
Don't just start dumping a lot of chicken in here.
I do two or three pieces at a time.
If you add a lot of chicken at once,
our flour gets really too clumpy
and it gets really difficult to work with.
A thousand pieces in there,
I'm not gonna be able to coat it really well.
Make sure that we get it into all the cracks and crevices.
Give it a light shake
and then we're gonna put it on the rack.
I like to use a rack for this part
because it allows the dredge
to evenly absorb the moisture from the chicken.
I try not to let them touch too much.
So we're gonna let this first dredge of flour
soak into the chicken.
We wanna let this sit
so that the dredge gets a little sticky and wet.
And this is gonna ensure that our crust
does not slide off the finished piece of chicken.
If it's wet and sticky, don't worry, it's gonna be okay
because I'm gonna do a second dredge before we fry
so that we get that really nice, thick, crispy crust.
One important thing here is not to get rid
of your flour at this point.
The brine that fell in there kind of wet some of the flour
and we got these nice little lumps.
This is gonna be great when we do our second dredge
'cause those lumps are gonna give us nice crunchy pieces.
So we've finished the first dredge of the chicken.
We're gonna let it sit here for about 25 to 30 minutes,
which gives us a lot of time to set up our fryer.
We have our chicken that has absorbed
all of that first dredge.
We have our dredge and we have our hot oil.
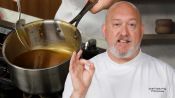
I chose to use a cast iron.
Cast iron pans are really dense and retain heat.
When you fry,
sometimes when you add the chicken to the pan,
you get a dip in temperature
and it makes your chicken greasy and soggy.
The cast iron lets us hold on to that heat
and maintain a nice even temperature throughout frying.
So I'm gonna take my chicken.
You can see that it's nice and sticky.
I'm gonna put it in for the second dredge.
I'm gonna get those nice big chunks, those nice big bits.
Give it a light shake, but don't shake it off too much
'cause that flour is gonna be our crust.
When we drop into the fryer, we drop away from us
so that if it splashes, it splashes away from us.
You can adjust your heat if you feel it's too high.
I think I got a really nice heat right now
and we're just gonna let it fry.
Leave it alone.
Once we start to see it getting brown on the bottom,
we'll give it a flip.
One of the most important things
that you wanna watch for when you fry is bubbles.
If you see bubbles, that means moisture is cooking out
and it's sealing that chicken in, oil is not getting in.
If you drop this into the pan and there's no bubbles,
you're gonna have greasy chicken.
So you wanna make sure that you always have some bubbles.
Alright, so it's been about four minutes
and we're gonna flip it over so the other side can cook.
I'm flipping away from me as well so I don't get splashed.
This batch is ready to go.
Drain it really well so we're not dripping everywhere,
right onto a rack.
The reason I want to put this on a rack
is that it won't be sitting in its juices
and it'll remain crispy.
If you put this on a plate,
the chicken's gonna steam from underneath
and your chicken's gonna get soggy, and we don't want that.
So put it on a rack to rest, drain it really good,
and then you fry your next batch.
If I was to take this chicken and not do the second dredge,
all the spots where it was wet would actually burn.
So that second dredge is really important.
Watch what's going on.
I'm looking for a nice, even brown color on the bottom
before I give it the flip.
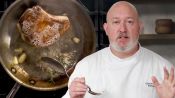
So my chicken is done frying. Look at that.
It's got that nice craggily crust on the outside.
I know that it's juicy in the middle because I brined it.
I just can't wait to get this on a plate and eat it.
My fried chicken takes a little time,
takes a little effort, takes a little bit of love,
but look at it, it is gorgeous.
Who would not want to have a piece of this fried chicken?
Put it up to my microphone. Can you hear this?
That is the sound of crispy chicken.
That wasn't a big enough bite. Hold on.
The crust is super crisp.
The chicken on the inside's super juicy.
The seasoning is all throughout the chicken
'cause we let it brine for 12 hours.
I think this is the perfect fried chicken.
I know frying at home can be intimidating sometimes,
but if you follow my method, you follow my technique,
you're gonna have tender, juicy,
and crispy fried chicken every single time.

The Best Way To Carve A Whole Chicken
The Best Way To Clean and Season a Cast Iron Skillet

The Best Way To Sharpen & Clean Knives (And The Worst)
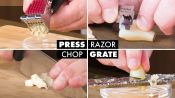
16 Ways To Peel & Cut Garlic Like A Culinary Instructor

The Best Way To Make French Fries At Home (Restaurant-Quality)

The Best Ways To Cook Bacon (And The Worst)
The Best Way To Fillet A Whole Fish

The Best Ways To Peel & Cut Onions (And The Worst)
The Best Ways To Make An Omelet (French & American)

The Best Way To Make Chicken Stock
The Best Way To Deep Fry Anything

The Incredible New Way to Poach Eggs that NEVER Fails
The Best Way To Make Pasta From Scratch
The 9 Essential Knife Skills To Master
The No-Fail Way To Sear Any Meat Perfectly

The Best Mashed Potatoes You'll Ever Make

Cooking Tips For Kitchen Beginners

The Best Way To Make Perfect Pancakes

How to Make Restaurant-Quality Mac and Cheese at Home

The Best Tomato Sauce You'll Ever Make (Restaurant-Quality)

The Best Salad You'll Ever Make (Restaurant-Quality)

The Best Fried Rice You'll Ever Make (Restaurant-Quality)
The Best Way To Make Sushi At Home (Professional Quality)

The Best Roasted Potatoes You'll Ever Make (Restaurant-Quality)
The Foolproof Way To Make Rice Like A Master Sushi Chef

The Cacio e Pepe Hack That Never Fails (Ft. Binging with Babish)

The Best Pizza You'll Ever Make
The Most Perfect, Silky, Creamy Scrambled Eggs You'll Ever Make

The Best Buffalo Wings You'll Ever Make (Restaurant-Quality)

The Best Tonkatsu You'll Ever Make (Restaurant-Quality)

The Best Chicken Breast You'll Ever Make (Restaurant-Quality)
The Best Grilled Cheese You'll Ever Make

The Best French Toast You'll Ever Make (Restaurant-Quality)
The Best Salmon You'll Ever Make (Restaurant-Quality)

The Best Potato Salad You'll Ever Make (Deli-Quality)
The Five Knives You Need In Your Kitchen (And How To Use Them)
These 5 Sauces Will Upgrade Your Weeknight Meal Game
The Best Pork Chop You'll Ever Make (Restaurant-Quality)

The Best Fried Eggs You’ll Ever Make

The Best Stuffing You’ll Ever Make

The Best Gravy You'll Ever Make

The Best Chilaquiles You’ll Ever Make (Restaurant-Quality)

The Best Guacamole You’ll Ever Make (Restaurant-Quality)

The Best Chocolate Cookies You’ll Ever Make

The Best Mexican Rice and Beans You’ll Ever Make

The Best Mexican Chicken Tacos You’ll Ever Make
The Best Sandwich You’ll Ever Make (Deli-Quality)

The Best Lasagna You'll Ever Make (Restaurant-Quality)

The Best Ways to Reheat Leftover Pizza (And the Worst)

The Best Queso You'll Ever Make is Queso Fundido

The Best Tortillas You Can Make at Home

The Best Salsa You'll Ever Make

The Best Pasta Carbonara You'll Ever Make (Restaurant-Quality)

The Best Fried Chicken You'll Ever Make
These 3 Dressings Will Upgrade Any Salad

The Michelin-Star Way to Make Salmon at Home
How to Make the Perfect Biscuits at Home

The Best Hamburger You'll Ever Make

These 3 Dips Will Level Up Any Dinner Party

The Best Steak You'll Ever Make (Restaurant-Quality)

The Best Grilled Chicken You'll Ever Make (Restaurant-Quality)

The Secret to Perfect Boiled Eggs (Soft, Jammy, Hard)

5 Garlic Techniques That Will Up Your Game

The Best Spaghetti and Meatballs You'll Ever Make (Restaurant-Quality)

The Best Pasta Bolognese You'll Ever Make (Restaurant-Quality)

The Best Prime Rib You’ll Ever Make (Restaurant-Quality)

The Best Fettuccine Alfredo You’ll Ever Make (Restaurant-Quality)

The Best Chocolate Chip Cookies You’ll Ever Make (Bakery-Quality)

The Best Brownies You'll Ever Make (Bakery-Quality)

The Best Chili You’ll Ever Make (Restaurant-Quality)
The Best Roast Chicken You’ll Ever Make (Restaurant-Quality)

The 6 Rules of Plating Used in Restaurants | Epicurious 101

The Best Way to Clean and Season a Wok

Why Stir Fry is Better in Restaurants (And How to Do It At Home)
Why Steaming is Better for Your Food (And How to Do It At Home)

The Best Mac and Cheese You'll Ever Make (Restaurant-Quality)