- 4 Levels
- Season 1
- Episode 76
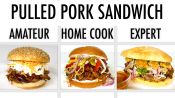
4 Levels of Pulled Pork Sandwiches: Amateur to Food Scientist
Released on 08/10/2021
[bottle squeezing] [knife chopping]
[pork rind cracking] [upbeat drum music]
I'm Jerry and I'm a level one chef.
Hi, I'm Kit and I'm a level two chef.
Hi, I'm Saul.
I'm a professional chef for the past 18 years.
[upbeat drum music]
I love pulled pork sandwiches.
I'm Puerto Rican.
We love roasting pork.
Let me tell you something about Tulsa in Oklahoma.
We make a divine pulled pork.
It's full of vinegar, it's full of flavor.
You're gonna enjoy this.
I'm going to make a pulled pork sandwich,
but I'm going to make my own version,
which is going to be a torta ahogada.
It's a pulled pork sandwich
drowned on chile de arbol sauce,
which is [lips smacking] delicious.
[dramatic music]
So now, we're gonna prep our pork,
specifically pork shoulder.
It has a lot of fat in it,
but the pieces that are left over are really tender.
I am using, actually, the pork butt roast.
Boneless because it's faster to cook.
It's a Mulefoot pork shoulder.
It's a heritage breed.
You can overcook this piece and it will taste delicious.
I'm just gonna use like five pounds
of this beautiful piece,
and the rest is going to be my lunch.
Basically, you're just gonna cut anywhere you want
until you feel the bone.
That's when you stop,
I'm gonna cut it around two to three inches
so it doesn't take that long to cook.
I like to clean my pork.
That's what my mom and my grandmama did.
White vinegar is not only great for cleaning,
it's also good for tenderizing meat.
So, score!
Two for the price of one.
Pour your water in, add our vinegar.
And then you kind of wash your meat.
Drain and dry it.
Get through all the cracks in the crevices.
Now you really want to get involved with the meat,
touch the meat, feel the meat.
We're gonna start off
with our-- Salt.
I like using kosher salt.
The texture of it has a little bit more substance
than a regular table salt.
[Jerry] I'll add in
a little bit of-- Pepper.
Fresh, cracked pepper.
I don't like that much spice.
So I'm just gonna give it a little bit of a sprinkle.
I know some people are going to kill me there.
We don't use lemon on the carnitas, but guess what?
I'm married to a Dominican.
My mother-in-law makes the best pernil.
So what I'm gonna do,
I'm gonna add some of her trick into my carnitas.
Rub it in the cutting board.
So when you do this to you lemons, right,
you don't need a lemon squeezer.
You only need you hands.
We're gonna use one and a half bottles of barbecue sauce.
And then we're gonna do salt.
I normally use kosher salt.
To me, it's less salty, and it's easier to control it.
[Jerry] And we're just gonna make sure that
the whole surface area of the pork is covered.
And then I rub it into the pork.
It's going to tend to rise a little bit
and cut through the fatness.
Now, I'm ready to sear my pork.
And I'm going to use some avocado oil.
It's a little bit less in calories.
Make sure the oil covers your pan.
The reason I choose to sear the meat
is that it locks in the flavors.
You brown each side
for anywhere between a minute to two minutes.
And as you hear that sizzle, you know you're getting close.
I just move it around, just to make sure.
And then you're gonna turn it around on this other side.
I want to save that little bit of extra
half of the bottle,
'cause if I'm feeling like
this pork is still feeling a little dry,
I can add a little bit more sauce at the end.
And now we're gonna do the rub.
Gonna add our chili powder, paprika,
garlic, onion,
brown sugar,
sea salt.
I like to mix this up first, the dry ingredients,
because the Dijon is wet.
And then you're gonna take this paste,
and mix it in to the meat.
So you take your time.
It's gonna get messy,
transfer it to saran wrap and wrap it up like a little baby.
So, now we're gonna stick this in the fridge
for about four hours.
Let it sit, two hours, and we're done.
Thank you, mother-in-law.
Our pork is seasoned and ready to go.
We're gonna put this into our Crock-Pot, just like that.
Get the rest of this excess sauce in there.
And we need a copper pot to cook the carnitas.
I'm gonna use five pounds of lard
because I'm going to cook the pork in their own fat.
So my lard is completely melted and it come,
it's already at 360.
That's perfect because I don't want to burn anybody's house.
Now we're going to fry the pork.
Be real careful.
Okay, baby.
There we go.
I'm gonna cook this first
because I want to get nice and gold color into this.
There's no gold, you wait, you wait, and you wait.
This is gonna be really delicious.
My carnitas are nice and gold.
Look, look at this beauty.
It smells like pure love in here.
We're gonna chop up a little yellow.
White. Onion.
You can use the Spanish onion, leftover onion,
your favorite onion.
Or no onion.
Your recipe, your way.
[Jerry] We're gonna cut these into some half moons.
You just want them small enough so they don't stay chunky.
You just cut it into four cubes.
And we're gonna just top this onto our pork.
Now I'm gonna saute it in the exact same pan
that I actually brown the meat.
Yes, you know what sound that is?
The sizzle.
Pork city. [laughs]
[Kit] Meat goes in.
And then for the garlic,
I don't need to take the skin of the garlic
because I tried to be asked authentic as I can.
And the last time I saw an old lady making a carnitas,
that's what she did.
Now, we're gonna add some thyme.
This is gonna add a lot of aroma.
Bay leaves.
If you don't have fresh, get dry ones.
Mix it well.
Now, I lower the temperature.
Add some cloves.
Now, we're gonna add some sweetness.
I add the entire orange.
Yeah!
The meat is gonna, cook it on each side
about a minute and a half, so you got to work quickly.
This is like a cooking sauce,
instead of adding water to your food.
You're gonna add a little bit extra.
We're gonna start with some evaporated milk.
I want to mix it well.
Equal parts, red wine.
One of my favorite things.
[Unison] Beer.
Try your ingredients.
Get to know you ingredients.
Cheers.
You're thinking, That might be a lot of alcohol!
I don't want to get drunk. [scoffs]
This is cooking, it will burn out.
It'll be fine.
Soda.
[Kit] Dr. Pepper.
It's going to add some caramelization and sweetness.
This really just takes a lot of the guesswork
out of it for you.
You literally can just leave it here,
and just trust the gods, [laughs]
the cooking gods, to take care of your pork.
It's gorgeous.
And then you're gonna pour your water and your juices
right there on it.
Grab the aluminum foil.
Let's cover it up.
We're gonna cook this on high
for about four or five hours.
And we are gonna go stick this in the oven
for about two and a half hours on 300 degrees.
Now, I lower the temperature,
and I let it cook there for like, two hours,
two and a half hours, until it's nice and tender.
Nothing goes with a pulled pork sandwich
quite like coleslaw does.
We're gonna use our pre mix here.
It's just green cabbage and carrots.
I like to cut up a cabbage myself.
I just feel like anytime you make food,
it should be fresh.
I like to start with the green.
Now let's make Mexican slaw.
Let's start by pickling our red onions.
Gonna do a julienne cut.
Julienne basically means fine strips
of whatever you're cutting.
And you always go slow
because we want to keep our fingers.
I'm gonna do it with my eyes.
You're watching this?
Don't do this at home.
So there you have our julienned onions.
We're gonna need three times as much red.
So the red cabbage is a little sweeter,
and the green actually gives it the kick.
We want them to sweat a little bit.
So we want to have some salt and limes.
Black pepper.
And I'm gonna put a little bit of Mexican oregano.
For some reason, the one from Mexico
is a little bit more flaky with more flowers.
Because it's going on the sandwich.
I'm not gonna make that much,
but if you have a lot of people coming over
or you do want it as a side dish
or you're just a big old coleslaw head, go nuts.
It's time to char my cabbage.
When you char a vegetable, the flavors come out even better.
Basically we're gonna do wedges.
A little bit of vegetable oil.
Some fresh red onion, in half.
I'll cut it in half again,
and then we cut it just like it is one of the cabbages.
And now we're gonna start adding the rest of our stuff
to our bowl.
Nothing builds off a coleslaw like mayonnaise.
I am a firm believer in a vinegar-based coleslaw
'cause mayo, mm-mm, not my thing.
[Saul] Three limes, juiced, for our cabbage.
I like to make my coleslaw
pretty saturated in this mayonnaise,
but mix it to your liking.
It seems like it's pretty dispersed pretty evenly.
I like to take.
[Unison] Salt.
Sugar,
celery seed, caraway,
apple cider vinegar,
a pinch of-- Pepper.
I'm a little spice sensitive,
so I'm just gonna add a little bit.
And the other side.
Make sure your grill is nice and hot.
Just do a little bit of oil in the towel and just wipe it.
You see a lot of smoke, it's ready.
You just put this one here.
Wanna make sure you get nice marks in it.
So, two to three minutes and look how beautiful this looks.
So we're just gonna cook it for three more minutes,
and that's it.
And now you wait.
Patience and faith.
And finally, we're gonna add in our avocado oil.
Look how beautiful this looks.
It looks semi-cooked, 'cause we want to keep it crunchy.
So now let's cut it
into thin strips,
AKA, julienne.
Oh my gosh! [laughs]
I got you again.
I got you again!
Mix this all up.
It's very light, it's very fresh.
Our onions look a little bit purple pink.
We're not using mayo, we no using any of that stuff.
And for the cilantro, let's just do the leaves.
Don't chop your cilantro up
because when you chop your cilantro, it turns black.
This coleslaw is looking pretty nice.
Cover it up.
I'm gonna put this in the fridge for about an hour
so the flavors can meld together
and then it'll be ready for that sandwich.
[claps hands]
Dinner.
Almost ready.
So now, for the sauce.
This mixture is gonna really add a lot of flavor
to our pulled pork sandwich.
So I'm gonna add a little bit more of the sauce
that we had leftover from before.
You can buy a barbecue sauce, but why?
You can make it, and it's so easy,
and you have everything at home.
I promise, it's simple.
You take your ketchup.
Get your brown sugar, apple cider vinegar.
And then, I like to stir it,
'cause if you don't, that brown sugar will start to clomp.
We don't want clumpy.
We want smooth.
So the salsa that I'm making,
it's not the classic salsa torta ahogada.
Why?
Normally people make the salsa with only chili de arbol,
but that's too spicy for me and for you guys.
Just a little bit of oil.
I'm gonna start with our chile guajillo.
Remove the seeds.
They're very hard to chew.
The chipotle.
This is one of my favorite, favorite peppers,
because it's not that spicy.
I think it's creamy, spicy, and smokey.
For the heat, I'm using chili de arbol, right?
So this is the hottest pepper out of these three.
You don't need to remove the seeds.
Make sure your oil is not too hot,
and we are going to toss them,
Start with the chile guajillo.
Now the chili chipotle, chili de arbol.
By toasting the peppers, you're gonna get the flavors
out of the pepper stronger.
And when this is happening, we're going to add onion.
[oil sizzling]
There we go.
Tomato, there we go. [oil sizzling]
The garlic.
We're going to smash it a little bit.
Add salt and water.
Now, we just want to boil it for 20 to 30 minutes.
We're gonna add some beer.
I want to preserve the sauce a little bit longer,
and also it's gonna add a little bit of bitterness
to the sauce.
Gonna add your salt.
Don't forget the paprika.
Cayenne pepper to give it a little heat.
And last but not least, cumin.
You're only gonna cook this for about three to five minutes,
but you want to make sure there are no lumps.
And right here is my homemade barbecue sauce.
I would definitely be up for trying that.
We cook it for 20 minutes.
Everything is soft.
Now we're gonna make it smooth.
Start slow. [blender whirring]
Slowly but surely.
And now, I'm gonna make a horseradish sauce.
And you're like, why are we making all this sauces?
There's a method to my madness.
First base, sour cream.
Some mayo.
Dijon.
Fresh horseradish is the best,
and this is what's gonna bring it all together.
Just a final.
[Unison] Pinch of salt.
[Saul] Needs a lots of salt.
Mix it together.
This is how I was gonna make this sandwich
the best sandwich.
Cut open your lime.
Just a squeeze will do.
Stir.
The sauce is ready.
The reason why it's straining
is because I don't want none of the seeds
from the peppers in it.
This is the fun part.
We're gonna pull the pork! [laughs]
We're gonna use two forks.
It comes right across.
La creme de la creme.
Shred it.
It's actually pretty satisfying.
You add about a tablespoon of Worcestershire
right in here.
Take that sauce that we made, put it right here in the pork.
Tada!
Now, I gotta make this into something amazing.
[trumpet blaring] Pulled pork, assemble!
That's a Avengers thing.
Okay, so. [chuckles]
I'm using potato buns and I got them seeded.
A potato roll will be okay.
But a brioche roll will be,
out of the park knockout.
One of the most important things on this torta ahogada,
it's the bread.
Find something that is crunchy from the outside,
and soft from the inside,
like my heart.
And I'm going to cut it in half.
I have something else better than butter.
This is my manteca.
This is the leftover from the carnitas earlier.
I'm gonna call it my Mexican butter.
My bread is ready.
I start with just a little bit of horsey,
and by a little bit, I mean a lot.
On the bottom bun, and then on the top bun
The carnitas, our-- Pulled pork.
I like to add my sauce at this stage.
It'll make your pulled pork a little bit more tender.
I like something with a little crunch.
[pork rind snapping]
Chicharon, it's pork skin.
It's been dehydrated for a bunch of hours,
and then it's fried.
What's better than pork?
More pork.
Our next step is our-- Coleslaw.
Yass!
Make it pretty.
Make it pretty.
[Jerry] Sharp cheddar cheese.
[Kit] Top it off at some spicy pickles and peppers.
Ooh baby, cut it in half.
The moment of truth.
Add this amazing sauce, and let's drown this torta ahogada.
And this is my pulled pork sandwich.
[gentle music] [dramatic echoing]
And this is my pulled pork sandwich.
[gentle music] [dramatic echoing]
This is my pork sandwich AKA torta ahogada.
[gentle music] [dramatic echoing]
[gentle music]
Let's dig in.
Ooh, it's gonna be so good.
[gentle music]
Oh, wow. Mmm, mmm.
I hate being self complimentary,
but that is deliciousness.
Even the sesame seeds on the bun
are really adding a crunch to this sandwich
that I really enjoy.
It's Oklahoma meets New York comes together in this.
A plate full of love.
It's spicy, it's sweet.
The chicharon, when you chew it,
it's just like eating chips.
Honestly, I'm not kidding.
Oh, sorry, I forgot.
[fork clanking]
[dramatic echoing]
Pulled pork is a quintessential Southern dish.
There are so many options for making this sandwich your own.
Let's see how each of our three chefs made theirs.
Jerry used a boneless pork shoulder for his sandwiches.
Pork shoulder is from the lower part
of the foreleg of a hog.
It's sometimes called a picnic shoulder
and it's a little leaner than the Boston butt,
which is higher up on the foreleg.
The hog needs this muscle for locomotion.
So it's a little tougher with connective tissue
that works well with slow, moist cooking methods.
Kit chose a pork butt instead, also called Boston butt.
But it's a shoulder cut from high on the foreleg,
rectangular in shape,
and containing several muscles and the blade bone.
It's a well-used set of muscles on the hog,
so it has lots of connective tissue,
and lends itself to low and slow cooking methods,
which gradually break down
fibrous connective tissue and proteins.
Saul picked a Mulefoot hog bone-in pork shoulder.
The Mulefoot is a very rare American breed of black hog
that's named for the distinctive, solid non-cloven hook
that resembles the hoof of a mule.
This type of hog is a good forager
and valued for how easily it fattens up
with excellent tasting meat and lard.
This is not a gamey tasting pork.
[dramatic beating drums]
Jerry used a slow cooker to cook his pork.
Because the pot or crock is made of ceramic,
it holds heat and distributes it pretty evenly,
but you may have a few hot spots here and there.
There's usually a recommended liquid level
to avoid uncontrolled heating,
so the pork is essentially steamed in the Crock-Pot,
which is an excellent moist heat method
for this tougher cut of pork.
This is a convenient appliance
that allows you to leave your pork alone while it cooks.
Leave it and believe it.
[Rose] Kit seared her pork
prior to putting it in the oven,
which will add Maillard browning flavors,
adding a roasted quality
that Jerry didn't get with his slow cooker.
What makes it even more juicy!
[Rose] Saul cooked his pork in a copper pot,
which is a very traditional way to cook pork in Mexico.
They said that they add a lot of flavor.
Honestly, I'm not sure about it.
Copper has been used as a cooking vessel
in many cultures for thousands of years.
It's an excellent heat conductor,
so heat spreads more quickly and evenly in copper
than in traditional pots and pans.
Fun fact: copper cookware has an antibacterial effect
because for many bacteria, copper is toxic.
Both Kit and Saul used soda to cook their pork.
Kit also added red wine to the mix, while Saul chose beer.
[beer cap popping]
Soda has a very low pH,
but doesn't taste sour because so much sugar is added.
The sugar is a flavor enhancer and balances
some of the taste of acidity from the vinegar in Kit's case,
and lemon juice in Saul's.
Rose, why is beer such a good tenderizer for meat?
Alcohol will add flavor
as well as release alcohol-soluble flavor molecules
in the meat and seasonings.
Most of the alcohol will cook off, but some may remain
since both Kit and Saul cooked their pork
at lower temperatures.
[dramatic beating drums]
One of the most important elements
of a pulled pork sandwich is the sauce.
The horseradish adds a peppery, spicy flavor.
It's a route that gives a distinctive pungent taste
from the compound allyl isothiocyanate,
which is activated by enzymes
once the root is graded or chopped
or when you start to chew.
It's a delicious addition to Kit's pulled pork sandwich.
Saul combined three dried chilies to make his dipping sauce.
The main physical difference
between dried and fresh chili peppers
is the amount of water they contain.
More water means the spicy capsaicinoid compounds
can move around in your mouth easier,
giving you a hotter eating experience.
However, dry chilies need to be rehydrated
before you can taste the heat.
So it's hard to tell which gives you the hottest experience.
Next time you are in the mood
to make pulled pork sandwiches,
we hope you'll take some of these tips
from our three wonderful chefs.

4 Levels of Chocolate Chip Cookies: Amateur to Food Scientist

4 Levels of Spaghetti & Meatballs: Amateur to Food Scientist

4 Levels of Brownies: Amateur to Food Scientist
4 Levels of Mac and Cheese: Amateur to Food Scientist

4 Levels of Hamburgers: Amateur to Food Scientist

4 Levels of French Toast: Amateur to Food Scientist

4 Levels of Omelets: Amateur to Food Scientist

4 Levels of Ice Cream Sundaes: Amateur to Food Scientist

4 Levels of Pizza: Amateur to Food Scientist

4 Levels of Fried Chicken: Amateur to Food Scientist

4 Levels of Pancakes: Amateur to Food Scientist

4 Levels of Lasagna: Amateur to Food Scientist

4 Levels of Tacos: Amateur to Food Scientist

4 Levels of Waffles: Amateur to Food Scientist

4 Levels of Cinnamon Rolls: Amateur to Food Scientist

4 Levels of Steak: Amateur to Food Scientist

4 Levels of Fettuccine Alfredo: Amateur to Food Scientist

4 Levels of French Fries: Amateur to Food Scientist

4 Levels of Cupcakes: Amateur to Food Scientist

4 Levels of Grilled Cheese: Amateur to Food Scientist

4 Levels of Chicken Soup: Amateur to Food Scientist

4 Levels of Carrot Cake: Amateur to Food Scientist
4 Levels of Chili: Amateur to Food Scientist

4 Levels of Chicken Wings: Amateur to Food Scientist

4 Levels of Mashed Potatoes: Amateur to Food Scientist
4 Levels of Roast Chicken: Amateur to Food Scientist

4 Levels of Cheesecake: Amateur to Food Scientist

4 Levels Of Burritos: Amateur to Food Scientist

4 Levels of Doughnuts: Amateur to Food Scientist

4 Levels of Sushi: Amateur to Food Scientist

4 Levels of Hot Dogs: Amateur to Food Scientist

4 Levels of Salmon: Amateur to Food Scientist

4 Levels of Scrambled Eggs: Amateur to Food Scientist

4 Levels of Onion Rings: Amateur to Food Scientist

4 Levels of Ramen: Amateur to Food Scientist

4 Levels of Fried Rice: Amateur to Food Scientist

4 Levels of Apple Pie: Amateur to Food Scientist

4 Levels of Chocolate Cake: Amateur to Food Scientist

4 Levels of Nachos: Amateur to Food Scientist

4 Levels of Potato Salad: Amateur to Food Scientist

4 Levels of Breakfast Sandwiches: Amateur to Food Scientist

4 Levels of Enchiladas: Amateur to Food Scientist

4 Levels of Banana Bread: Amateur to Food Scientist
4 Levels of Dumplings: Amateur to Food Scientist

4 Levels of Fish & Chips: Amateur to Food Scientist

4 Levels of Veggie Burgers: Amateur to Food Scientist

4 Levels of Grilled Fish: Amateur to Food Scientist

4 Levels of Tarts: Amateur to Food Scientist

4 Levels of Tostadas: Amateur to Food Scientist

4 Levels of Gumbo: Amateur to Food Scientist

4 Levels of Stuffed Peppers: Amateur to Food Scientist

4 Levels of Chicken Sandwich: Amateur to Food Scientist

4 Levels of Biscuits: Amateur to Food Scientist

4 Levels of Custard: Amateur to Food Scientist

4 Levels of Meatballs: Amateur to Food Scientist

4 Levels of Sandwich Cookies: Amateur to Food Scientist

4 Levels of Kebabs: Amateur to Food Scientist

4 Levels of Flatbread: Amateur to Food Scientist

4 Levels of Bloody Mary: Amateur to Food Scientist

4 Levels of Pad Thai: Amateur to Food Scientist

4 Levels of Spring Rolls: Amateur to Food Scientist
4 Levels of Chowder: Amateur to Food Scientist
4 Levels of Roast Pork: Amateur to Food Scientist

4 Levels of Shrimp & Grits: Amateur to Food Scientist

4 Levels of Curry: Amateur to Food Scientist
4 Levels of Layer Cake: Amateur to Food Scientist
4 Levels of Meatloaf: Amateur to Food Scientist

4 Levels of Pigs In A Blanket: Amateur to Food Scientist
4 Levels of Biryani: Amateur to Food Scientist
4 Levels of Baked Potato: Amateur to Food Scientist
4 Levels of Ravioli: Amateur to Food Scientist
4 Levels of Pork Chops: Amateur to Food Scientist

4 Levels of Paella: Amateur to Food Scientist

4 Levels of Milkshakes: Amateur to Food Scientist

4 Levels of Crepes: Amateur to Food Scientist
4 Levels of Pulled Pork Sandwiches: Amateur to Food Scientist

4 Levels of Birthday Cake: Amateur to Food Scientist

4 Levels of Chips & Guacamole: Amateur to Food Scientist

4 Levels of Eggs Benedict: Amateur to Food Scientist

4 Levels of Pudding: Amateur to Food Scientist

4 Levels of Lamb Chops: Amateur to Food Scientist

4 Levels of Turkey Sandwiches: Amateur to Food Scientist

4 Levels of Chicken Nuggets: Amateur to Food Scientist

4 Levels of Sugar Cookies: Amateur to Food Scientist

4 Levels of Hot Chocolate: Amateur to Food Scientist

4 Levels of Lobster Rolls: Amateur to Food Scientist

4 Levels of Baked Ziti: Amateur to Food Scientist

4 Levels of Buffalo Wings: Amateur to Food Scientist

4 Levels of Quesadilla: Amateur to Food Scientist

4 Levels of Poutine: Amateur to Food Scientist

4 Levels of Tamales: Amateur to Food Scientist

4 Levels of Ice Cream Sandwich: Amateur to Food Scientist

4 Levels of Pasta Bolognese: Amateur to Food Scientist

4 Levels of Fish Tacos: Amateur to Food Scientist

4 Levels of Mozzarella Sticks: Amateur to Food Scientist

4 Levels of Empanadas: Amateur to Food Scientist

4 Levels of Cacio e Pepe: Amateur to Food Scientist

4 Levels of Chicken Parm: Amateur to Food Scientist

4 Levels of Samosas: Amateur to Food Scientist

4 Levels of Boneless Wings: Amateur to Food Scientist

4 Levels of Garlic Bread: Amateur to Food Scientist

4 Levels of Caesar Salad: Amateur to Food Scientist

4 Levels of Tater Tots: Amateur to Food Scientist

4 Levels of Egg Rolls: Amateur to Food Scientist

4 Levels of Chips & Queso: Amateur to Food Scientist

4 Levels of BLT: Amateur to Food Scientist

4 Levels of Calamari: Amateur to Food Scientist

4 Levels of Pesto Pasta: Amateur to Food Scientist

4 Levels of Pasta Carbonara: Amateur to Food Scientist

4 Levels of Deviled Eggs: Amateur to Food Scientist
4 Levels of Chicken Tenders: Amateur to Food Scientist

4 Levels of Frittata: Amateur to Food Scientist

4 Levels of Tiramisu: Amateur to Food Scientist

4 Levels of Risotto: Amateur to Food Scientist

4 Levels of Strawberry Shortcake: Amateur to Food Scientist

4 Levels of Gnocchi: Amateur to Food Scientist

4 Levels of BBQ Ribs: Amateur to Food Scientist

4 Levels of Ice Cream Cake: Amateur to Food Scientist

4 Levels of Deep Dish Pizza: Amateur to Food Scientist

4 Levels of Jerk Chicken: Amateur to Food Scientist