- 4 Levels
- Season 1
- Episode 77
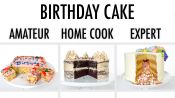
4 Levels of Birthday Cake: Amateur to Food Scientist
Get Baking: 31 Birthday Cake Recipes to Make All Your Wishes Come True
Released on 09/01/2021
[upbeat music]
I'm Emily, and I'm a level one chef.
I'm Gabrielle, and I'm a level two chef.
I'm Penny, and I'm a chef
at the Institute of Culinary Education.
I've been a chef for 16 years.
[upbeat music]
Today I'm gonna be making a regular old vanilla cake
with sprinkles in it.
I'm going to be making
a chocolate cake with peanut butter frosting,
which is really kind of
a traditional birthday cake in my family.
The birthday cake that I'm gonna make today
is gonna be a light luscious white cake,
soaked in St. Germain.
The cake is going to have sprinkles on the inside of it,
and on top it's gonna have beautiful
piped buttercream flowers.
This cake is gonna blow your mind.
Normally I would use a box mix.
They're good.
But, here it's a very special day,
it is,
Epicurious' birthday!
So I'm making one from scratch.
If you're gonna have a birthday cake,
you just gotta go for it.
So the first thing I'm gonna do
is mix together my dry ingredients.
Flour, baking powder, and salt.
I'm gonna be using a traditional creaming method,
what I would call the basic cake making method.
I'm going to go ahead and put all my dry ingredients
into my mixer.
[Penny] I'm going to start with my
sugar. Sugar.
Cocoa powder, baking soda --
Cake flour and all purpose flour.
And this mix,
gives me,
a combination between a stable cake, that has some body.
And also it has lightness.
Salt.
You always need some salt.
Sweet things with a little salt taste better.
Always salt.
Almost forgot,
baking powder. Baking powder.
Powder peanut butter.
So this kinda gives you the flavors that you want.
Without having to worry about
dealing with the texture of regular peanut butter.
And then, my all purpose flour.
[Penny] Okay, so now everything's mix together.
I'm going to add my butter.
So the next thing I'm going to do
is combine my butter and sugar.
Uh, a fancy one.
Look at those settings.
Nope, nope... That's the way you-
Okay, cool.
[mixer whirs]
Got it!
We're good, we're good.
Sugar.
I think some people go for a really long time
with the mixer, but I don't know why.
So I don't.
It already smells good.
Now, I'm gonna go ahead and move into my wet ingredients.
And the first step to that, is egg whites.
So, I'm gonna crack my eggs on the counter
and never on the side of the bowl.
Because it's not splintering the shell as much.
I'd love to tell you what the secret
to not getting shell is, in.
But I feel like if I say it aloud anything
about how to not get shell in,
I would immediately get shell in.
[mixer whirs]
[Gabrielle] I'm gonna just go ahead and whisk this first
and that way I don't have to worry about doing that
with everything else trying to get in.
I'm gonna put a glove on.
And then, very gently, I'm gonna go in, and pinch,
with my fingers underneath.
And drop these into a bowl, to make a delicious custard
or something else with them later.
[Emily] That's egg number one.
Now, egg number two.
My whole milk,
my egg whites,
vanilla bean paste.
I prefer to use vanilla bean paste.
I find that it just has a much stronger vanilla flavor,
when I'm choosing between extracts and pastes.
The next thing I'm gonna do is add my vanilla
into my milk.
Boop. That's all.
So, I have my vegetable oil,
that's gonna make it nice and moist.
And then my buttermilk, which is the key ingredient here,
because the buttermilk is what really gives it that richness
and that moisture.
I wanna alternate adding my flour mixture
and my milk mixture.
I wanna start slow so I don't wear all the flour.
And you just have to kinda work with it
and ease things in.
I'm just reading the internet and doing what I'm told.
And I'm gonna mix this
until I don't see the butter anymore.
When I add the milk, I like to turn it on to stir,
and I like to stream it down the side of the bowl.
And I would describe that, as a batter made.
[Gabrielle] Now I have my hot water,
and I'm gonna pour it in really slowly
because I don't want to accidentally cook the eggs
that I have in here.
Slowly start to add my wet ingredients in.
My batter is made, except,
I need my sprinkles!
So, I'm just gonna gently fold this in.
Because if I beat this in, this would just be a brown mess
instead of a beautiful rainbow of cake.
This is looking really smooth
and that's what I'm kind of looking for.
I'm not looking for anything specific
in terms of the look of the batter,
it's really more just letting it go for two solid minutes
after the addition of each section of the milk.
So, I like to bake my cake in individual layers.
When you bake it in thinner layers,
you just get a better bake,
because it doesn't spend as long in the oven
so it doesn't dry out as much.
It may not seem even but,
it's a superpower,
it's even.
One of the most crucial steps, I think, in baking a cake,
is making sure you can get it out of the cake pan.
I'm also going to add some cocoa powder
and then that would also help to get
the cake out once it's baked.
I have a greased and a parchment papered pan.
And I'm gonna put my batter right in there.
[Penny] Just kind of work it towards the edges evenly.
I think the main goal is just making sure
that they're even and you do have enough room
for them to grow.
Even it out with a spatula.
And then I might give it like a little shake.
I kind of like to give it a little tap-tap.
The corners are kinda hard to spatula into.
Now, you can be as aggressive as you want.
[loud banging]
Cake levels itself.
I'm gonna go bake it in the oven at-
[All] 530
Degrees, standard oven.
For like, 35 to 40 minutes.
My cake is in the oven,
so I'm gonna start working on my frosting.
I'm gonna be making a traditional American buttercream.
And I'm gonna be making it pink.
Today I'm making a Swiss merengue butter cream.
It's going to be a little bit less sweet
than your traditional buttercream,
which is going to pair beautifully with the chocolatey,
savoriness of the cake.
My buttercream is
a royal icing,
that has butter added to it.
I'm not 100% sure what royal icing is,
but it does sound pretty fancy.
Royal icing is something
you might traditionally see on decorated cookies.
It'll dry firm
and it'll be something
that would last a really long time
but when we add butter to it,
we turn it into an icing
that doesn't have any of the greediness
that American buttercream traditionally has.
I have my butter at room temperature
so it'll be nice and easy to cream.
So the first thing I'm gonna do is add my salt and vanilla
and cream these things together.
[mixer whirs]
So, what I'm going to do next is create a double boiler.
I'm going to make sure I'm controlling the temperature
that the sugar is melting and combining with the egg whites.
And I'm gonna start by adding my powdered sugar.
[Penny and Gabrielle] Egg whites.
And I'm also gonna add my salt at this point.
The salt is for flavor, for sure,
but it's also to help me break up the proteins in the eggs
and to get them going.
Having the brown sugar as opposed to just
the traditional white sugar
is going to give me a little bit more of
that depth full flavor that I'm looking for.
And again, this is made with love so,
if it's not perfect, you know, that's what happens.
But also, fool with threats usually works out, too.
You will be delicious!
So I'm just gonna let this go and it's gonna take a while.
You're gonna feel like this is not happening
and it's never gonna happen
and I promise you, it will.
Basically we're making a merengue right now.
And we're gonna start off kind of slow,
and then we're gonna go ahead and get it going.
The next thing I'm gonna do is start adding in my sugar,
a little bit at a time.
And this is icing sugar, powdered sugar.
I like this speed, we are going to keep it,
we're on a cruise.
So you know you're starting to get close with the royal,
when you start to see a kind of holding shape
around the exterior of the bowl.
Okay, let's see where we're at.
So see how this is being held up,
it's being suspended into the air.
Now, I'm gonna start adding-
[Penny and Gabrielle] A lot of butter.
And while this is mixing,
I can go ahead and add my vanilla bean paste.
Just saying, you can add a little bit of boost to this too,
wouldn't be a terrible thing.
Just a little splash of milk.
All right, I think this is pretty much ready,
except, I need to add a couple of drops of my food coloring.
Gonna make it pink, so that Epicurious would know I care.
We want it a little bit more of this texture,
so that is nice for piping.
Buttercream is done.
So what I'm gonna do is take half of this buttercream
and set that aside.
I'm gonna have chocolate buttercream on the inside
and vanilla on the outside for the aesthetics.
Time to put in the rest of my ingredients,
which is going to be my powdered peanut butter,
my vanilla and my salt.
And all I'm doing is just mixing this together
until is good.
So my buttercream is ready.
This looks done.
And now I have this really beautiful frosting,
and it has this nice merengue base.
[mixer whirs]
All right, I declare that, pink buttercream.
All right so, now it's time to assemble my cake.
And my cakes turned out beautifully.
This is always, to me,
the most difficult phase of cake baking.
Do I just turn it over?
I might just turn it over.
Do you think it'll just come out if I...
I was going for more of a rounded square, anyway.
I have everything ready to go.
The first thing that I'm gonna do is mix up
my soak for the cake,
and for that I'm gonna use simple syrup and St. Germain,
elder flower liqueur, its very floral.
Come on.
I have a good feeling.
By baking the cakes my way,
they're very even,
we don't have to trim off excess cake
and it just really bakes really evenly, nice and fluffy.
Basically, the first thing I'm gonna do
is go ahead and trim off this bubble layer
where it kind of rose up,
because I want them to be nice and even layers.
Gorgeous!
Look at that!
So, my cake is a surprise inside cake.
Which means that when you cut into it
you get an explosion of something,
and in this case is our really pretty
and fancy golden sprinkles.
I have four layers of cake,
one of which would not be tempered with at all,
but the other three,
are gonna have a hole punched out at the center.
Little gently, gently.
Ta-da!
Look at that.
It's like I've done it before.
Okay you pink buttercream, let's go.
So, technic may be like a strong word
for how I frost things,
it's more of a dump and spread.
I'm just gonna just get a nice, big dollop of this,
put it in the middle.
I'm gonna just go ahead and start working it
towards the edges.
One cake layer goes down, turned upside down.
I always turn it upside down
because this part of the cake was that was in touch
with the parchment, it's always even,
it's always flat and it's got the most porous texture.
Cold cake, warm syrup.
If the syrup and the cake are both cold,
it's not going to soak up.
Now, I'm going to go ahead and take my frosting
and start just applying it to the outside.
I'm going to make my, what's called, a crumb coat.
I like the idea of it being a little bit more rustic.
I'm gonna go ahead and start creating this crumb layer look,
it's visible on the bottom so,
I'm gonna try and make that a little bit more visible
on the top layer as well.
And by the way,
this is how you hold an offset spatula,
not like this,
it was meant to be like this,
so it moves your hand away from the cake.
This is going to come as a shock to a lot of people,
but I'm not really the best at frosting cakes.
[Emily laughs]
Now, layer two goes over.
And we repeat this process again,
turn the turn table.
And that'll do the work for me.
One more time.
And my sprinkles,
I'm gonna lie down delicately in the center,
I'm gonna pick it up,
and then,
fill up the center of my cake with sprinkles.
Frosting a cake is like a Bob Ross painting,
you know, like, there are no mistakes
just happy little accidents.
And my final cake will go in the top,
St. Germain sugar syrup.
And I try to put as much icing on top as I think I need
to crumb coat the whole cake.
Don't be afraid to be the boss of your cake.
So, this is just gonna hang out in the freezer
for about 15 minutes,
it's gonna get nice and stable for me,
so I'll be able to put my next coat of icing on
and it won't move around.
[Emily] Thin layer on the sides.
[Penny] Put a little bit more icing this time.
Pile it up pretty high on top.
This time, though, I want a thicker coat in.
And it's gonna look a little varied
but that's sort of look I'm going for,
I'm not trying to make it look perfect.
Perfection is for level three.
Now I've switched tools.
It's flexible and I just leave that here,
and I spin my turn table
and it totally smooths itself,
I don't have to work that hard.
Same thing here,
up against the side of the cake,
and spin the cake.
[Gabrielle] I'll have this really cute swirl
in the middle.
Now, if you don't leave a little bit of cake showing,
people aren't gonna know that there is sprinkles inside.
And that's really important.
[Penny] Now, my final touch to this cake,
it's gonna be to add a bunch of edible glitter.
That's my cake ready for it's final decoration.
It's time to move beyond what you see
and make it beautiful.
My Mona Lisa.
I have some of the frosting,
I have some chocolate that we're gonna shave on top,
fancy.
I can practice what it's gonna look like,
I like that.
[Penny] Let's start out with anybody's favorite rose.
What if I do like this?
Is this pretty?
When you're decorating a cake,
it's good to have flowers of different sizes,
it adds visual interest but it also helps
you when you have some nooks and crannies
where you need to hide some thing.
I'm not gonna do any of those things.
I'm gonna just try writing Happy birthday Epicurious
on here with the gel writing pen
and then just put a bunch of sprinkles everywhere.
So, I'm basically a child.
[Emily laughs]
That's kind of big, that's okay.
It's fun.
[Penny] I'm gonna pipe a round of icing,
it's gonna help me get some height.
So I'm gonna start with my biggest flower,
which is my hero flower.
[Emily] Wow, that is not really how you write a P.
[Penny] Some of my little flowers,
go on my nooks and crannies.
And I'll add a few vines.
[Emily] This is level one flowers.
I think for me, just using the start tip
and sort of making these little ruffly roses,
is just all I need.
[Penny] Don't be afraid to overlap.
Cute!
How cute!
I'm very happy with that.
[Emily] As you can see I was, obviously,
an art major in school.
I think that using a dark chocolate bar
is gonna bring out those flavors really nicely.
Okay, cool.
I think that is a perfect birthday cake
and I have no questions.
I'm just gonna add some sprinkles all over it now.
And that's it.
How do I know when it's done?
It's done.
And this,
is my birthday cake.
[camera shots]
And this,
is my birthday cake.
[camera shots]
And this,
is a Penny Stankiewicz's birthday cake.
[camera shots]
[tranquil music]
All right, we have a birthday cake.
Because, it's Epicurious' birthday.
What's any birthday cake, without a couple candles?
Happy birthday Epicurious!
Happy birthday!
Happy birthday!
And now it's time to taste my cake.
Now I'm ready.
Are you ready for this?
There's the magic.
Let's eat some birthday cake.
Here we go.
Wow.
I think that's mighty fine.
[Emily laughs]
The cake is really moist,
it's really nice and rich and chocolatey.
And I feel like the peanut butter frosting is just,
so light and airy and fluffy and silky.
The buttercream is like,
delicious.
It's got just the right amount of salt.
And, I mean, look at those sprinkles,
how can you say no to that?
It's delicious, it's bright, it's light.
The cake, being a white cake, makes the chocolate,
stand out even more.
The St. Germain has soaked in
and it's add this floraliness.
And it just tastes like joy.
That's as good as my wedding cake.
Of course my wedding cake
also came from a grocery store but-
[Emily laughs]
Birthday cake says celebration like no other dessert.
Let's see how each one of our three chefs made theirs.
[mystery drum music]
Emily made her vanilla birthday cake
using a traditional creaming method.
What I would call the basic cake baking method.
She creamed softened butter
together with white crystalline sugar.
This added volume because the sugar crystals
make the pockets in the soften butter,
allowing air to enter and lighten the mixture.
Eggs are added to emulsify or hold the sugar
and butter together in suspension.
This ensures that the batter will hold the additional liquid
and flour to make a delicious cake.
Emily, alternately, added her dry and wet ingredients
to the creamed mixture.
This reduced the amount of mixing of the flour,
decreasing gluten formation.
Gabrielle used a combination of baking powder and soda.
In this case, the baking powder does most of the leavening.
The baking soda contributes to the leavening as well,
while also neutralizing the acidic ingredients
like the buttermilk and cocoa powder.
This is a runny, loose batter which will induce
lots of steam to assist with leavening during baking
and give the cake a higher domed top.
Penny used what we call a reverse creaming method
for mixing her birthday cake.
With this method softened butter is added
directly to the dry flour and sugar mixture
with some of the milk and egg mixture
to initially moisten the batter.
The idea is to coat the gluten proteins in the flour
with fat from the butter
which modifies hydration of these proteins
and thereby limits gluten development.
The texture is like Emily's conventional cake
but slightly more delicate with an ever so spongy quality
that really elevates Penny's cake to level three.
It just bakes really evenly, nice and fluffy.
[mystery drum music]
Gabrielle made peanut butter Swiss merengue frosting.
It's based on whipped egg whites,
which contain proteins, some of which are attracted to water
and some that are repelled.
When you whip them and introduce air,
the water loving proteins cling to the water
in the egg white
while the water repelling proteins cling to the air.
With the extended whipping,
more bubbles surrounded by proteins are formed
and it fluffs right up.
She mixed her egg whites with brown sugar,
which is white sugar coated with molasses.
So, it has a darker color with a slight minerally,
tangy flavor profile.
Gradually adding the butter in small amounts,
once the merengue cools is essential.
Otherwise you'll deflate your merengue and get a smooth,
sweet marshmallowy concoction that may taste good
but won't be thick enough to smoothly glide over your cake.
It's delicious and silky and smooth.
Penny made two types of royal icing buttercream
for her beautiful, level three, four tier birthday cake.
I make good cake.
Typically, royal icing is a smooth, stiff
and very stable mixture of just egg whites
and confectioner sugar.
It's so stable because the proteins in the egg whites
combine with the sugar and harden quickly.
Which means, timing matters when you're working
with royal icing.
Penny added luxurious amounts of butter
to give it shine and soften the texture of it.
Making a birthday cake is such a happy way
to celebrate someone you love or in this case,
something we love.
Happy birthday Epicurious and may you have many many more.
4 Levels of Chocolate Chip Cookies: Amateur to Food Scientist

4 Levels of Spaghetti & Meatballs: Amateur to Food Scientist
4 Levels of Brownies: Amateur to Food Scientist
4 Levels of Mac and Cheese: Amateur to Food Scientist
4 Levels of Hamburgers: Amateur to Food Scientist

4 Levels of French Toast: Amateur to Food Scientist
4 Levels of Omelets: Amateur to Food Scientist
4 Levels of Ice Cream Sundaes: Amateur to Food Scientist

4 Levels of Pizza: Amateur to Food Scientist
4 Levels of Fried Chicken: Amateur to Food Scientist

4 Levels of Pancakes: Amateur to Food Scientist

4 Levels of Lasagna: Amateur to Food Scientist

4 Levels of Tacos: Amateur to Food Scientist

4 Levels of Waffles: Amateur to Food Scientist
4 Levels of Cinnamon Rolls: Amateur to Food Scientist
4 Levels of Steak: Amateur to Food Scientist
4 Levels of Fettuccine Alfredo: Amateur to Food Scientist

4 Levels of French Fries: Amateur to Food Scientist
4 Levels of Cupcakes: Amateur to Food Scientist
4 Levels of Grilled Cheese: Amateur to Food Scientist

4 Levels of Chicken Soup: Amateur to Food Scientist
4 Levels of Carrot Cake: Amateur to Food Scientist
4 Levels of Chili: Amateur to Food Scientist
4 Levels of Chicken Wings: Amateur to Food Scientist
4 Levels of Mashed Potatoes: Amateur to Food Scientist
4 Levels of Roast Chicken: Amateur to Food Scientist
4 Levels of Cheesecake: Amateur to Food Scientist
4 Levels Of Burritos: Amateur to Food Scientist
4 Levels of Doughnuts: Amateur to Food Scientist

4 Levels of Sushi: Amateur to Food Scientist

4 Levels of Hot Dogs: Amateur to Food Scientist
4 Levels of Salmon: Amateur to Food Scientist
4 Levels of Scrambled Eggs: Amateur to Food Scientist

4 Levels of Onion Rings: Amateur to Food Scientist

4 Levels of Ramen: Amateur to Food Scientist

4 Levels of Fried Rice: Amateur to Food Scientist
4 Levels of Apple Pie: Amateur to Food Scientist

4 Levels of Chocolate Cake: Amateur to Food Scientist

4 Levels of Nachos: Amateur to Food Scientist

4 Levels of Potato Salad: Amateur to Food Scientist

4 Levels of Breakfast Sandwiches: Amateur to Food Scientist

4 Levels of Enchiladas: Amateur to Food Scientist
4 Levels of Banana Bread: Amateur to Food Scientist
4 Levels of Dumplings: Amateur to Food Scientist
4 Levels of Fish & Chips: Amateur to Food Scientist
4 Levels of Veggie Burgers: Amateur to Food Scientist

4 Levels of Grilled Fish: Amateur to Food Scientist
4 Levels of Tarts: Amateur to Food Scientist

4 Levels of Tostadas: Amateur to Food Scientist
4 Levels of Gumbo: Amateur to Food Scientist

4 Levels of Stuffed Peppers: Amateur to Food Scientist
4 Levels of Chicken Sandwich: Amateur to Food Scientist

4 Levels of Biscuits: Amateur to Food Scientist
4 Levels of Custard: Amateur to Food Scientist

4 Levels of Meatballs: Amateur to Food Scientist
4 Levels of Sandwich Cookies: Amateur to Food Scientist

4 Levels of Kebabs: Amateur to Food Scientist

4 Levels of Flatbread: Amateur to Food Scientist

4 Levels of Bloody Mary: Amateur to Food Scientist

4 Levels of Pad Thai: Amateur to Food Scientist
4 Levels of Spring Rolls: Amateur to Food Scientist
4 Levels of Chowder: Amateur to Food Scientist
4 Levels of Roast Pork: Amateur to Food Scientist

4 Levels of Shrimp & Grits: Amateur to Food Scientist

4 Levels of Curry: Amateur to Food Scientist
4 Levels of Layer Cake: Amateur to Food Scientist
4 Levels of Meatloaf: Amateur to Food Scientist

4 Levels of Pigs In A Blanket: Amateur to Food Scientist
4 Levels of Biryani: Amateur to Food Scientist
4 Levels of Baked Potato: Amateur to Food Scientist
4 Levels of Ravioli: Amateur to Food Scientist
4 Levels of Pork Chops: Amateur to Food Scientist

4 Levels of Paella: Amateur to Food Scientist
4 Levels of Milkshakes: Amateur to Food Scientist
4 Levels of Crepes: Amateur to Food Scientist
4 Levels of Pulled Pork Sandwiches: Amateur to Food Scientist
4 Levels of Birthday Cake: Amateur to Food Scientist

4 Levels of Chips & Guacamole: Amateur to Food Scientist

4 Levels of Eggs Benedict: Amateur to Food Scientist

4 Levels of Pudding: Amateur to Food Scientist

4 Levels of Lamb Chops: Amateur to Food Scientist
4 Levels of Turkey Sandwiches: Amateur to Food Scientist
4 Levels of Chicken Nuggets: Amateur to Food Scientist

4 Levels of Sugar Cookies: Amateur to Food Scientist
4 Levels of Hot Chocolate: Amateur to Food Scientist

4 Levels of Lobster Rolls: Amateur to Food Scientist
4 Levels of Baked Ziti: Amateur to Food Scientist

4 Levels of Buffalo Wings: Amateur to Food Scientist

4 Levels of Quesadilla: Amateur to Food Scientist

4 Levels of Poutine: Amateur to Food Scientist

4 Levels of Tamales: Amateur to Food Scientist
4 Levels of Ice Cream Sandwich: Amateur to Food Scientist

4 Levels of Pasta Bolognese: Amateur to Food Scientist

4 Levels of Fish Tacos: Amateur to Food Scientist

4 Levels of Mozzarella Sticks: Amateur to Food Scientist

4 Levels of Empanadas: Amateur to Food Scientist

4 Levels of Cacio e Pepe: Amateur to Food Scientist

4 Levels of Chicken Parm: Amateur to Food Scientist

4 Levels of Samosas: Amateur to Food Scientist

4 Levels of Boneless Wings: Amateur to Food Scientist
4 Levels of Garlic Bread: Amateur to Food Scientist

4 Levels of Caesar Salad: Amateur to Food Scientist

4 Levels of Tater Tots: Amateur to Food Scientist

4 Levels of Egg Rolls: Amateur to Food Scientist

4 Levels of Chips & Queso: Amateur to Food Scientist

4 Levels of BLT: Amateur to Food Scientist

4 Levels of Calamari: Amateur to Food Scientist

4 Levels of Pesto Pasta: Amateur to Food Scientist

4 Levels of Pasta Carbonara: Amateur to Food Scientist
4 Levels of Deviled Eggs: Amateur to Food Scientist
4 Levels of Chicken Tenders: Amateur to Food Scientist

4 Levels of Frittata: Amateur to Food Scientist

4 Levels of Tiramisu: Amateur to Food Scientist

4 Levels of Risotto: Amateur to Food Scientist

4 Levels of Strawberry Shortcake: Amateur to Food Scientist

4 Levels of Gnocchi: Amateur to Food Scientist
4 Levels of BBQ Ribs: Amateur to Food Scientist
4 Levels of Ice Cream Cake: Amateur to Food Scientist

4 Levels of Deep Dish Pizza: Amateur to Food Scientist

4 Levels of Jerk Chicken: Amateur to Food Scientist