- 4 Levels
- Season 1
- Episode 29
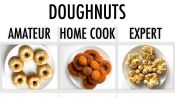
4 Levels of Doughnuts: Amateur to Food Scientist
Released on 12/26/2019
[glass clinks against metal]
[fire roaring]
[upbeat music]
Hi, I'm Shane and I'm a Level 1 chef.
I'm Anthony and I'm a Level 2 chef.
Hi, I'm Tracy from
The Institute of Culinary Education
and I'm a Level 3 chef.
[upbeat music]
What I love about donuts is that
everybody likes donuts.
When people come over, they're gonna enjoy it.
I guarantee it.
My favorite thing about these donuts
is that first bite.
[sigh] God, your eyes roll back in your head.
It is incredible.
What I love about donuts is they can be
an appetizer, your entree or a dessert.
[bold music]
All right, I'm gonna get started on my batter.
I have my all-purpose flour.
I'm gonna put this in first.
I'm gonna begin by adding my high gluten flour.
The point of this is that you want
a nice, even, soft consistency.
The next step is to use the whole wheat flour.
The two different types of flours just
give it more flavor.
Our instant rise yeast.
The yeast will help the donuts rise.
That'll get caught in the dough and
it'll start expanding and that's
what makes the donuts go poof.
All right, next my baking powder.
Some salt in there.
Sugar as well.
Nutmeg.
Now I'm whisking this all together.
You wanna make sure you don't get any big
pockets of salt.
If we had liquid and we didn't mix up the dry stuff
you could have clumps of salt,
which sounds good to bite into.
Probably wouldn't be in a donut.
In goes the milk.
And the vanilla.
We're gonna mix this on low for just a minute or two.
We're using a fresh yeast today because
it has more flavor than just a regular yeast
like a dry or an instant yeast.
And you wanna crumble it up so it kind of
hydrates and becomes this liquid before
we add it to our dough.
Just mixing.
Mixing it up.
[machine whirs]
I'm gonna wisk together my yeast and my water
and I'm gonna add it to my eggs for my liquids.
And now we're gonna turn it off
and just add our wets to our dries.
[Anthony] Now it's time to add our eggs.
I'm gonna throw my butter in.
One down.
Time for number two.
Going for third.
And last but not least.
Grab the butter.
Take a little clump at a time
and work it in.
What this butter is gonna do is
it's gonna give structure to your batter.
It's also gonna give your batter
a lot of richness and flavor.
Next, I'm gonna put in my milk,
my yogurt, my egg and my vanilla.
Move the mixture around until
everything's evenly distributed.
We're gonna bring this up to
about a medium speed
for about six to eight minutes.
And we're gonna let it sit at room temperature
for the first bulk ferment which is gonna
give our dough some flavor.
We just put flour down so it doesn't really
make a mess and get stuck to our work surface.
And I'm gonna flour my hands as well so it
doesn't stick to me and then we can't do anything.
And I'm just gonna pull one side,
fold it over on itself like a letter.
For the young people out there,
those were early days emails.
[Tracy] So we're just gonna wrap this up.
We don't want our dough to dry out.
Keep out all the nasties.
Now we're gonna let this rest for about 45 minutes.
So we're gonna let this proof for an hour,
during which the yeast will start to activate
and start chewing those sugars,
and you'll see this bad boy start to rise.
And then we'll let it chill in the fridge overnight.
All right, looks like our dough is done resting.
We're gonna release the gas from our dough.
So we kind of just want to punch it down
and then we are going to wrap it right back up
and put in the fridge overnight.
All right, my batter's ready.
You wanna make sure that you don't
ride up too high on the edges.
You also want to make sure that you
don't get anything on that center pin
or they won't look like donuts.
So now our dough has sat overnight.
I'm gonna just lightly flour my bench
and we're looking to roll this about a half inch.
So, because I'm looking to keep the bottom of
my donut hole, I'm just gonna take my round cutter
and, essentially, mark it because I'm gonna
poke it out after I fry it.
You know, I don't know who first holed a donut
but I'm very thankful that that person did.
I think it had something to do with how it cooks.
Maybe a little bit more surface area means that
you can get a crispier outside and a more tender inside.
I don't fill these all the way up to the top
because when you bake them, they're gonna rise
and you don't want them to overflow the pan.
Make sure you leave enough room for them to grow
because you don't want them to knock
into each other as they will rise again.
All right, my batter's all in the pan.
We're gonna let these rest for
about an hour and a half.
All right, we've got our six donuts
and our six holes.
We're gonna let these sit at
room temperature for about an hour.
I'm gonna be filling my donut with a lemon curd.
So, I'm gonna have one egg yolk
and then I'm gonna have three whole eggs
and I'm gonna whisk that together with some sugar.
So I have some fresh squeezed lemon juice
and I'm gonna add my eggs and my sugar into that.
And we're gonna set this on top
and let it cook until it thickens.
And you wanna make sure you're whisking
continuously as you do this because your eggs
will curdle if you don't.
So, now that this has thickened,
we are going to remove it from the heat
and we are gonna add our butter in.
And we are gonna use a hand blender
to emulsify our lemon curd.
We're gonna put this in the fridge
for about two hours and then we're gonna
use it to fill our donut.
I like to bake my donuts because you
get a soft, tender crumb and it's a lot
less messy than other methods.
Also, it's a lot less greasy than frying
so at least you can pretend that it's healthier.
The proper donut is fried.
There's no way around it.
Cake or yeast: it should be fried.
Now I'm gonna bake this for 10 minutes at 350 degrees.
I like frying as my method because it's an
incredibly efficient way to cook donuts.
I look for these little dimples that are on the dough.
That's how I can usually tell they're ready.
So, I like to do, usually, just a few at a time.
And I drop them in and I give them a little flip.
We'll start with three.
We don't wanna over crowd the pan.
Cause if we do that, then they might stick
together and then they won't cook
as well or as fast.
No touching.
No touching.
I'm looking for these to be a nice golden brown.
So, once they're nice and golden brown,
we can give them a flip.
Flip, that indicates that it's been well fried.
I like to shove them around a little bit
to help mix up that oil.
I don't think you have to do that,
it's just kind of fun.
Guy needs a little longer.
I don't wanna over cook them.
I don't want them to get stale and hard.
I want that oil just to drip down into the pan
instead of straight onto my table.
We're using canola oil.
The canola oil brings a nice neutral flavor
which means it doesn't really add much flavor.
Just the fry.
So we have a nice, golden brown
and, most importantly, we have a
proper ring around our donut.
All right, my donuts are out of the oven.
They've got some nice little golden brown sections.
That's definitely what you're looking for.
All right and these are done frying.
All right, let's get these bad boys
into some sugar and cinnamon.
And then into my face.
Now, time to make my glaze.
In front of me, I have sugar and I have some milk.
The consistency of this should be quite thick.
I chose cinnamon sugar because it's a classic paring.
A little bit of the sweet from the sugar
and then that flavor kick from the cinnamon
goes well with the fried flavor of the donuts.
I'm gonna let my donuts sit for a little while
longer to get cooled because when I put the
glaze on top, I don't want it to run off the donuts.
I'm gonna make a toasted meringue that's
gonna go on top of my donut.
I'm gonna take my egg whites
and I'm gonna whisk these with sugar
and we're gonna set this over a double boiler.
We need to cook this until the egg whites
reach about 160 Fahrenheit.
So, my egg whites are nice and frothy
and they are warm and they're gonna whip up,
cool down and become stiff.
I'm just gonna add a little bit of vanilla extract
just for a little more flavor and some sweetness.
Now I'm gonna put the meringue in this piping bag.
All right, time to assemble our donuts.
I'm going to put my donuts on this cooling tray.
I'm going to spoon the glaze
on top of the donuts.
Maybe a half spoonful at any one time.
And it is okay, of course, if some drips over.
Give a quick swirl to make sure that they're
nice and evenly coated.
I like to shake out the excess as well.
I want to be able to have the entire donut
without feeling like it's sticky, sweet and gross.
The first thing I need to do
is cut out my centers.
I don't want to go all the way to the bottom
cause I want a little nest for my
lemon curd to sit in.
And I don't wanna go all the way to the top.
Now I'm going around with my Swiss meringue.
I like to toast my meringue because
it not only gives flavor,
it also gives dimension with our color.
This is a standard Pate Brisee,
which is a flaky pie crust.
I took my scraps from a
standard times making pie.
I rolled them out really thin
and then I put some fresh lemon sugar on top.
The last thing I'm gonna do before we finish
our donuts is add some fresh lemon zest
just to really bring out the lemon flavor.
And these are my donuts.
[camera snap]
And these are my donuts.
[camera snap]
These are my Lemon Meringue Pie donuts.
[camera snap]
Let's give them a try.
Yeah
Really good.
Nailed it.
Moist, sweet but not too sweet
People think, oh, you can't possibly make
donuts at home but you can.
Clean up is simple and it doesn't take much time.
There's nothing quite like having a
donut that has come fresh out of the fryer
and straight into the sugar
and then straight into your face.
My favorite part's definitely the pie crust.
It's something really unique in a donut
and I think texture's really important
when you have a soft dessert like a donut.
[loud bang]
Let's see how each of our
chef's made their donuts.
[loud bell rings]
Shane made a cake style donut
which relied on baking powder,
a chemical leavener to raise his batter
as opposed to yeast.
Baking powder is double acting,
which means it produces carbon dioxide
at room temperature when moisture is added
and then again when the batter is
heated through the baking process.
Releasing carbon dioxide twice is a safety net
for ensuring leavening, especially if you forget
to preheat an oven or your oil.
The structure of Shane's donuts came from
a combination of all purpose flour
with whole wheat, pastry flour which is
low in protein and contains the bran,
the germ and the endosperm
of the wheat kernel.
Anthony and Tracy made yeast raised donuts
which were much lighter than Shane's cake donuts.
Baking yeast creates and releases carbon dioxide
through a slow biochemical reaction
that occurs as it ferments sugar
and starches in the dough.
This ensures a light, pillowy dough texture.
Anthony used an instant yeast.
Our instant rise yeast.
Which is quick acting and can be added
directly to dry ingredients.
It's been commercially dried,
becoming porus and soaks up water very quickly.
Which is why you don't need to
hydrate it prior to mixing.
Tracy used fresh yeast in her donuts.
Sometimes called cake yeast,
it comes in small, compressed blocks
and is very high in moisture: about 70%.
It is minimally processed and develops more
complex flavors than the instant yeast that Anthony used.
She also used a high gluten flour
which contains more glutenin and gliadin,
which are the two proteins that when
kneaded together with water form gluten.
Gluten traps the carbon dioxide from the yeast
fermentation and creates a lighter, fluffier donut.
After 45 minutes of proofing,
Tracy's dough doubled in size.
She punched it down and lightly kneaded it,
allowing the yeast to be redistributed
fermenting all of the available sugars
and producing additional carbon dioxide.
[loud bell rings]
After they finished proofing, Anthony and Tracy
both needed to shape their donuts.
Shane, however, was able to just pour his
batter into a special donut pan.
This molded the batter into standard donut rings
and ensured the interior of his batter would be heated.
He baked his donuts for 10 minutes
much like you would a cupcake.
Maillard browning and caramelization also happened
imparting sweet, roasted notes to his donuts.
Both Anthony and Tracy fried their donuts.
Canola oil is genetically modified
and has a high smoke point.
It's a neutral oil so it didn't
impart any additional flavors.
Beautiful! Oh Man!
Three of our chefs cooked their donuts
at a similar temperature.
But oil conducts heat much faster than air
so while Anthony and Tracy only needed
to fry their donuts for a minute or two,
Shane required a longer baking time.
[loud bell rings]
Shane made a simple glaze by heating
confectioners sugar with milk--
It sounds almost too simple
but trust me, it tastes really great.
With heat, the sugar dissolves quickly
creating a translucent, sweet glaze.
Anthony made a classic donut coating
from crystallized sucrose or table sugar and cinnamon.
This mixture adds a satisfying crunch
and a warming sweetness to his donuts.
It's taking every bit of self control for me
not to eat these right as they come out of the bowl.
Tracy made a complex and delicious
variation on a lemon meringue pie with her toppings.
The lemon curd that she made from fresh
lemon juice, eggs and butter added a lemony,
sour note from the naturally occurring
citric and malic acids in lemon.
She also made Swiss meringue which was
done by whipping eggs whites with sugar
over heat, making them white, sweet and fluffy.
She toasted the meringue with a propane torch,
adding caramel color and a very slight, thin crunch.
Finally, she added some flaky pie crust
to tie together all of the toppings.
Donuts are a delicious treat.
Whether they're simple or more complicated.
Next time you're making donuts,
I hope you'll consider some of these tips.

4 Levels of Chocolate Chip Cookies: Amateur to Food Scientist
4 Levels of Spaghetti & Meatballs: Amateur to Food Scientist

4 Levels of Brownies: Amateur to Food Scientist
4 Levels of Mac and Cheese: Amateur to Food Scientist
4 Levels of Hamburgers: Amateur to Food Scientist

4 Levels of French Toast: Amateur to Food Scientist
4 Levels of Omelets: Amateur to Food Scientist

4 Levels of Ice Cream Sundaes: Amateur to Food Scientist

4 Levels of Pizza: Amateur to Food Scientist

4 Levels of Fried Chicken: Amateur to Food Scientist

4 Levels of Pancakes: Amateur to Food Scientist

4 Levels of Lasagna: Amateur to Food Scientist

4 Levels of Tacos: Amateur to Food Scientist

4 Levels of Waffles: Amateur to Food Scientist

4 Levels of Cinnamon Rolls: Amateur to Food Scientist

4 Levels of Steak: Amateur to Food Scientist
4 Levels of Fettuccine Alfredo: Amateur to Food Scientist

4 Levels of French Fries: Amateur to Food Scientist

4 Levels of Cupcakes: Amateur to Food Scientist
4 Levels of Grilled Cheese: Amateur to Food Scientist

4 Levels of Chicken Soup: Amateur to Food Scientist
4 Levels of Carrot Cake: Amateur to Food Scientist
4 Levels of Chili: Amateur to Food Scientist
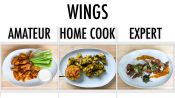
4 Levels of Chicken Wings: Amateur to Food Scientist
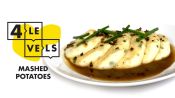
4 Levels of Mashed Potatoes: Amateur to Food Scientist

4 Levels of Roast Chicken: Amateur to Food Scientist
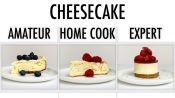
4 Levels of Cheesecake: Amateur to Food Scientist

4 Levels Of Burritos: Amateur to Food Scientist
4 Levels of Doughnuts: Amateur to Food Scientist

4 Levels of Sushi: Amateur to Food Scientist

4 Levels of Hot Dogs: Amateur to Food Scientist
4 Levels of Salmon: Amateur to Food Scientist
4 Levels of Scrambled Eggs: Amateur to Food Scientist
4 Levels of Onion Rings: Amateur to Food Scientist

4 Levels of Ramen: Amateur to Food Scientist

4 Levels of Fried Rice: Amateur to Food Scientist
4 Levels of Apple Pie: Amateur to Food Scientist

4 Levels of Chocolate Cake: Amateur to Food Scientist

4 Levels of Nachos: Amateur to Food Scientist

4 Levels of Potato Salad: Amateur to Food Scientist

4 Levels of Breakfast Sandwiches: Amateur to Food Scientist

4 Levels of Enchiladas: Amateur to Food Scientist
4 Levels of Banana Bread: Amateur to Food Scientist
4 Levels of Dumplings: Amateur to Food Scientist

4 Levels of Fish & Chips: Amateur to Food Scientist
4 Levels of Veggie Burgers: Amateur to Food Scientist
4 Levels of Grilled Fish: Amateur to Food Scientist
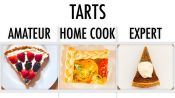
4 Levels of Tarts: Amateur to Food Scientist

4 Levels of Tostadas: Amateur to Food Scientist

4 Levels of Gumbo: Amateur to Food Scientist

4 Levels of Stuffed Peppers: Amateur to Food Scientist

4 Levels of Chicken Sandwich: Amateur to Food Scientist

4 Levels of Biscuits: Amateur to Food Scientist

4 Levels of Custard: Amateur to Food Scientist

4 Levels of Meatballs: Amateur to Food Scientist
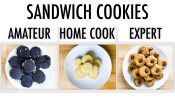
4 Levels of Sandwich Cookies: Amateur to Food Scientist

4 Levels of Kebabs: Amateur to Food Scientist

4 Levels of Flatbread: Amateur to Food Scientist

4 Levels of Bloody Mary: Amateur to Food Scientist

4 Levels of Pad Thai: Amateur to Food Scientist
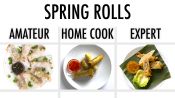
4 Levels of Spring Rolls: Amateur to Food Scientist
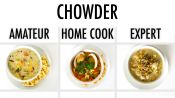
4 Levels of Chowder: Amateur to Food Scientist
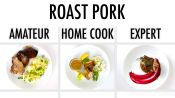
4 Levels of Roast Pork: Amateur to Food Scientist
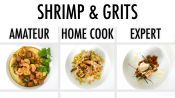
4 Levels of Shrimp & Grits: Amateur to Food Scientist

4 Levels of Curry: Amateur to Food Scientist
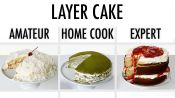
4 Levels of Layer Cake: Amateur to Food Scientist
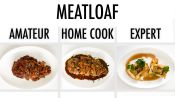
4 Levels of Meatloaf: Amateur to Food Scientist

4 Levels of Pigs In A Blanket: Amateur to Food Scientist
4 Levels of Biryani: Amateur to Food Scientist
4 Levels of Baked Potato: Amateur to Food Scientist
4 Levels of Ravioli: Amateur to Food Scientist
4 Levels of Pork Chops: Amateur to Food Scientist

4 Levels of Paella: Amateur to Food Scientist
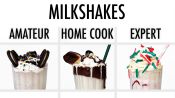
4 Levels of Milkshakes: Amateur to Food Scientist
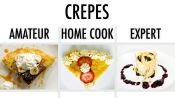
4 Levels of Crepes: Amateur to Food Scientist
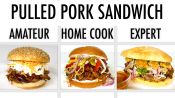
4 Levels of Pulled Pork Sandwiches: Amateur to Food Scientist
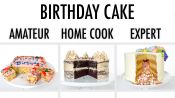
4 Levels of Birthday Cake: Amateur to Food Scientist

4 Levels of Chips & Guacamole: Amateur to Food Scientist

4 Levels of Eggs Benedict: Amateur to Food Scientist

4 Levels of Pudding: Amateur to Food Scientist

4 Levels of Lamb Chops: Amateur to Food Scientist
4 Levels of Turkey Sandwiches: Amateur to Food Scientist
4 Levels of Chicken Nuggets: Amateur to Food Scientist

4 Levels of Sugar Cookies: Amateur to Food Scientist

4 Levels of Hot Chocolate: Amateur to Food Scientist

4 Levels of Lobster Rolls: Amateur to Food Scientist
4 Levels of Baked Ziti: Amateur to Food Scientist

4 Levels of Buffalo Wings: Amateur to Food Scientist

4 Levels of Quesadilla: Amateur to Food Scientist

4 Levels of Poutine: Amateur to Food Scientist

4 Levels of Tamales: Amateur to Food Scientist
4 Levels of Ice Cream Sandwich: Amateur to Food Scientist

4 Levels of Pasta Bolognese: Amateur to Food Scientist

4 Levels of Fish Tacos: Amateur to Food Scientist

4 Levels of Mozzarella Sticks: Amateur to Food Scientist

4 Levels of Empanadas: Amateur to Food Scientist

4 Levels of Cacio e Pepe: Amateur to Food Scientist

4 Levels of Chicken Parm: Amateur to Food Scientist

4 Levels of Samosas: Amateur to Food Scientist

4 Levels of Boneless Wings: Amateur to Food Scientist
4 Levels of Garlic Bread: Amateur to Food Scientist

4 Levels of Caesar Salad: Amateur to Food Scientist

4 Levels of Tater Tots: Amateur to Food Scientist

4 Levels of Egg Rolls: Amateur to Food Scientist

4 Levels of Chips & Queso: Amateur to Food Scientist

4 Levels of BLT: Amateur to Food Scientist

4 Levels of Calamari: Amateur to Food Scientist

4 Levels of Pesto Pasta: Amateur to Food Scientist

4 Levels of Pasta Carbonara: Amateur to Food Scientist
4 Levels of Deviled Eggs: Amateur to Food Scientist
4 Levels of Chicken Tenders: Amateur to Food Scientist

4 Levels of Frittata: Amateur to Food Scientist

4 Levels of Tiramisu: Amateur to Food Scientist

4 Levels of Risotto: Amateur to Food Scientist

4 Levels of Strawberry Shortcake: Amateur to Food Scientist

4 Levels of Gnocchi: Amateur to Food Scientist

4 Levels of BBQ Ribs: Amateur to Food Scientist

4 Levels of Ice Cream Cake: Amateur to Food Scientist

4 Levels of Deep Dish Pizza: Amateur to Food Scientist

4 Levels of Jerk Chicken: Amateur to Food Scientist