- 4 Levels
- Season 1
- Episode 34
4 Levels of Onion Rings: Amateur to Food Scientist
Released on 03/04/2020
[upbeat percussive music]
Hi, I'm Stephen and I'm a level one chef.
Hi, I'm Beth and I'm a level two chef.
Hi, I'm Frank, I'm a chef
from the Institute of Culinary Education
and I've been a chef for 24 years.
[upbeat percussive music]
What makes my onion rings special
is that they're extra crunchy
and this recipe has been passed down from generations
on the internet.
[laughing]
I think what makes the recipe special
is I soak it in buttermilk.
I like to believe that it makes the onion rings
more tender and then we put it into a nice tempura batter.
Look, I'm not gonna go crazy cheffy on it.
What I'm gonna do is try
and make a really good quality onion ring
that just happens to be gluten free as well.
[dramatic thumping music]
I think the name in itself tells you
where you need to start.
You need to start with first pickin' the right onion.
Definitely buy sweet onions.
I just chose a white onion.
It is just a regular yellow onion
that's been genetically modified
to weigh a hundred pounds.
First thing we have to do is peel the onion
and slice it into rings.
I like this onion because white onions
tend to be very uniform.
The layers are a little bit thinner on the inside
so you're not getting like a big honkin' chunk of onion,
you get a nice kinda thin layer.
You wanna have 'em--
Half-inch slices.
A quarter-inch apart.
You want them thick,
so this onion, probably in thirds.
I like to use a thick slice
because it gives more surface area for a batter to stick.
You leave the skin on, just so you can keep
the nature of the onion intact for as long as possible.
This allows the onion to kind of
come to terms with his fate.
So what I'm gonna do with these,
I'm gonna put 'em in a pan, right?
I have a little bit of vegetable oil.
I'm not just gonna have a raw onion flavor,
I'm gonna have an onion flavor with more depth to it, okay?
Season both sides.
And I'm not too worried about about
takin' them apart in rings just yet.
[grunting] It's very satisfying.
This is probably enough for one portion,
one onion for one portion.
And we're gonna put 'em in the pan.
And I'm not gonna cook these for a long time.
So just a little light browning.
Nothing too crazy.
If they're cooked all the way through,
it's gonna be difficult to handle them.
I want them to still hold their shape, okay?
So there we are.
I'm gonna put these in the fridge
until they're chilled completely through.
Once you have your sliced onion rings,
you're gonna wanna give them their buttermilk bath.
Buttermilk is going to just
introduce a little bit of a tang.
Put it right in your refrigerator 30 minutes
so it's nice and chilled.
So now we're gonna mix our three dry ingredients.
So first, we wanna grab our flour.
Add the salt, baking powder, mix it up.
30 minutes later, here we are.
Nice and cold, drip off the excess.
Throw them in, coat them.
Just plain flour.
At this point, you don't need any seasoning.
All the flour's gonna do is be something
that the tempura batter can hold onto.
And I'm really trying to have one wet hand
and one dry hand.
So I let my onions chill for about a half hour.
I wanna chill these because a cold product
will hold onto the batter a little more.
I'm just gonna dab up that excess oil
because the oil will stop the batter from sticking.
But I'm just gonna break these into rings.
So, if they're still fairly firm,
but a little bit pliable now, which is good,
and much what I'm looking for.
And there's my rings.
Next, we coat the onion rings with a batter.
So, to make the tempura batter really, really easy,
start with flour.
It's not traditional tempura,
but it has a nice tempura kind of feel to it.
It's light, it's crispy.
In this bowl, I have some rice flour.
Now we're gonna add the milk to the mixture, like so.
You're gonna add some cornmeal.
Cornmeal has just a little different taste,
a little texture in your mouth.
Throw in some salt. Throw in some salt.
Some baking powder,
baking powder will help with the rise.
Some paprika.
Just wanna whisk that together
to make sure everything is combined.
Into my rice flour, my corn starch goes in.
And then we're gonna crack our egg.
Please don't put no shells in your onion ring.
You want it to be crunchy, but not that way.
It can be a little lumpy,
you want it to be like pancake batter.
And then I'm gonna add some beer.
Add beer.
And what I'm looking for
is a very thick cream consistency.
I go with all the beer.
The beer brings a little bit of yeastiness
and toastiness to the batter.
And then I introduce some seltzer
and start mixing to see how much I need.
Seltzer brings lightness.
See all the bubbles?
And most traditional tempuras are done
with seltzer as something neutral.
But whenever I think of onion rings,
I think of beer batter, okay?
This is a little too thick.
Little more water.
You can always add.
So now that it's nice and smooth,
it's a nice heavy cream consistency,
I'm gonna add my xanthan gum.
What xanthan gum does is that
it'll help the batter stick to the onion a little better.
It'll also help the batter repel oil,
so the onion ring won't be quite as oily.
And you want it to be smooth, no chunks.
Onion ring batter is much like
what you want in a relationship,
just very consistent, very fluid, and easy to get through.
Time for frying!
That means we're gonna eat soon.
I really like this setup.
My onion rings, my tempura batter, my oil,
a rack with a sheet tray so that it can drain.
If you put it on paper towels,
it gets kinda soggy, kinda mushy.
I don't, I like it to be crisp all the way around.
We will put our onions into the batter.
Oh no, I should have done it individually!
Oh geez, this is a mess.
All right, we're gonna put 'em back on our tray
so that any excess gets off of the onion ring.
I'm just a lowly onion ring maker.
The last and final step would be to bread the onion rings.
So we're gonna take these battered onions.
So we're gonna coat these twice in the bread.
And that's all we're gonna do, we're take our rings,
and what I try and do is keep one hand dry--
Wet hand and dry hand. And one hand wet.
So let's use this hand as my dry hand.
Now I see why you use one hand
'cause then you get the clumpy fingers.
Make sure we get corn starch on, tap it off,
you don't want lumps of corn starch.
I'll take my onion rings,
make sure they're coated really well.
Once I drop this in--
[sizzling]
Love that sizzle. It's sizzling.
Now we're gonna cook these onion rings
for about two to three minutes or until golden brown.
Well, they're not gonna be golden brown
'cause I'm using rice flour and corn starch.
For the most part, I'm not really worried
that they're brown, I'm really worried that they're crisp.
These are getting golden, so we're gonna take these out.
Oh, that's a good one.
And while they drain,
I'll hit 'em with just a little bit of salt.
Salt. Salt.
Let it rain the salt.
And we're gonna let them cool.
We're gonna have patience
and not put newly fried onion rings in your mouth.
I would never do that twice.
So before we get to the onion rings, let's talk sauces.
You can't have perfect onion rings
without the perfect sauce.
They have to be dipped in something.
First, we gotta start with our honey mustard.
Very important staple in your onion ring process.
Honey mustard adds the zest that some onion rings lack.
Not mine, but some.
And then we move to infamous honey barbecue sauce.
As a vegetarian, I like to dabble in things
that remind me of eating meat.
Honey barbecue sauce because it reminds me
that I used to eat ribs.
And I miss ribs from time to time.
That's very personal.
So, now we go to the ranch.
Everyone loves ranch dressing.
I make mine just a little different.
I like to make mine with fresh ingredients.
It's a lot better than you would get out of the packet.
And then ketchup, [smacks]
there's a reason they give you ketchup
with every onion ring.
'Cause it tastes good.
Ketchup's okay, but this is heaven.
We're gonna start with certainly some mayonnaise.
And I'm gonna grate the onion.
You can use as much or as little as you like.
So, I'm gonna start with scallions,
just gonna chop them real fine.
I'm gonna cut it down the middle, chop.
I'm gonna use a clove of garlic,
give it a smash,
and what's great about this recipe
is you can adjust it to your taste.
That's the neat thing about a recipe,
it's just a jumping off point.
All that oniony goodness.
Salt, pepper, sweet relish, adobo sauce, and ketchup.
Now all we need is those beautifully
golden brown onion rings.
And then we're gonna add some fresh herbs.
You need to have dill and you need to have thyme.
And then a little bit of parsley,
parsley'll add some freshness to it.
Some nice Dijon mustard, so a lot of dressings start
and end with mayonnaise, but I also like to add
a little bit of sour cream, and not a little bit,
it's usually half and half sour cream.
A nice, hefty dose of cracked black pepper.
And a fair amount of salt.
A little bit of rice wine vinegar in here,
it's gonna cut that fattiness.
Give it a good stir.
Make sure everything's incorporated,
and then I let this sit.
The longer it sits, usually the better the flavor,
but you wanna let it sit for at least 40, 35 to 40 minutes.
And that's the ranch dipping sauce for my onion rings.
Now all we have to do is plate these onion rings
and the sauce, so that everybody can have a taste.
I'm not gonna make it too cheffy or fancy,
I'm just gonna put it on a plate with some of the sauce.
I just want it to look abonanza.
You want it to look big.
So you can almost make like a mountain.
And these are my special triple-dipped onion rings.
[thunk]
Here are my onion rings.
[thunk]
And these are my by accident gluten free onion rings.
[thunk]
[light anticipatory music]
Dip it in.
Listen for the crunch.
Bottoms up.
[crunching]
And just like I thought, harmonious.
Awesome onion rings.
Oh, that's really good. Mm.
This is absolutely delicious.
The onion rings,
I don't think could've been made any better by me.
You should make my onion ring recipe
just because it's not as hard as you think it is.
The only thing I would do differently
is I would have my sons in the kitchen with me
so that we could be making this, assembly line style,
moving quickly from station to station.
That would be heaven.
[thunk]
Onion rings are a favorite side
and often the perfect complement to burgers and hot dogs.
They are also a wonderfully salty appetizer
to get you primed for a good meal.
Let's see how our three chefs took on this fried favorite.
[rumbling drums]
While choice of onion is based on personal preference,
it's necessary that all the onions used
within each recipe are cut to the same width
to ensure consistencies in frying.
Stephen used a yellow onion with a quarter-inch cut,
while Beth and Frank went with white onions,
using a half-inch cut and one-inch cut respectively.
It can just be any sweet onion.
Yellow onions are full flavored
and bred specifically to demonstrate sweetness
and turn a rich, dark brown when caramelized.
Spanish onion's just a close cousin of white onion.
White onions have a golden color when cooked,
and a particularly sweet flavor once sauteed.
People are divided on whether to soak their onions
in water, vinegar, or buttermilk,
which is what Beth chose to do.
This is used to marinate the onion,
giving some more flavor to them,
and can also drive off overly pungent sulfuric onion notes.
Frank decided to brown his onions quickly
to extract some of the sugars,
which make the onion sweeter,
as well as removing some of the excess water
from the onions themselves.
When there is too much water,
it takes more energy and will cause the oil to drop
to a temperature where your breading can become soggy
or even stick to the other onion rings.
Mushy, soggy onion rings, definitely not a fan.
Frank also pre-dusts his onions with salt and pepper,
then chills them in the refrigerator,
which sets the batter for an even frying later on.
And ensures that all the rings
are at the same temperature for even cooking.
[rumbling drums]
Stephen only uses flour, which can develop gluten,
and over-mixing can lead to a potential issue
of over-blending the batter, causing a dense, chewy coating.
I'm just trying my best at this point.
Beth adds cornmeal in addition to flour,
which will make the onion ring more fritter-like,
but will also help disrupt the gluten formation.
Beth also decided to add flavor to her onions
by soaking them in buttermilk
prior to adding the onions into the batter.
Frank is using a blend of rice flour and corn starch,
which tends to be much crunchier than wheat flour.
By omitting wheat flour,
there is no longer a potential for gluten formation.
Frank also used xanthan gum, which is a natural gum
and contributes to a good viscosity in the batter.
And it's just there to make a little stickier.
He still wants to avoid over-mixing
to prevent losing the carbonation from the seltzer or beer.
In onion rings, it's all about the batter consistency.
If your batter is too thick or too thin,
you can have issues such as hollowing, tailing, or nerding.
Hollowing is when the batter gets too thick,
it can cause uneven frying and lumping.
What happens is water migrates out
and breaks the cell wall of the batter from the onion,
which comes from water loss.
This causes the onion to detach
from the rest of the batter post-fry.
Which you can tell by the whole onion
being pulled out of the batter ring when you bite into it.
One thing that I can't stand about onion rings
is when you bite into it, the onion pulls out.
It drives me crazy.
Mine will not do this.
Too thick of a batter can also cause tailing,
which is when points of the batter stick out like a tail
and you don't have a perfect circle in your onion ring.
When the batter is too thick,
droplets of batter itself will get into the fry oil
and create little balls that float.
Those little balls are referred to as nerds,
and if too much nerding occurs,
the oil will become more challenging to keep clean
and have a good fry.
It's not really as hard as it sounds.
[rumbling drums]
The right oil temperature is critical in frying,
and it is important to balance the time
and temperature in the fryer to ensure
we have a crispy, golden brown exterior
while maintaining a perfectly done interior.
It's better to use a neutral oil such as canola,
soybean, peanut, or vegetable oils,
which naturally have a higher smoke point.
You'll get golden brown onion rings every single time.
[Jessica] You wouldn't wanna use a premium oil
such a olive oil, as it has a very low smoke point,
and when heating, due to the low smoke point,
you will develop off flavors in your onion rings.
Those bubbles you see after foods
being dropped into the fryer is moisture evaporating
from the food from the heat.
The water in the product is boiling out
and it's not getting soggy.
Instead of the oil being used to increase the temperature
of the food itself, that energy is being displaced
to cause the water to vaporize.
[rumbling drums]
Stephen chose not to make his own sauce,
which limits the opportunity
to have completely complementary dipper and sauce.
Sorry.
He did, however, offer a variety of sauces,
allowing for no shortage of flavor combinations.
Sauce options are completely subject
to personal preference,
but when possible, a homemade sauce allows
for perfect flavors to blend together.
Both Beth and Frank decided to make their own sauces
which complement each of their dishes exceptionally well.
Beth also decided to add an adobo sauce
from canned Chipotle peppers,
which are smoked jalapeno peppers.
This along with relish introduced a tang,
which tends to cut the sweetness of the fried onion ring.
All of it is delicious, I promise you.
Frank also introduced tang
into his homemade ranch dressing,
but with Dijon mustard instead of relish.
Building complementary layers of flavor
in multiple parts of your recipes
helps drives home a big impact.
Golden brown onion rings with an adobo sauce.
Delicious.
Beth's special sauce uses store-bought mayo
and ketchup as the base, which are both fairly acidic.
But she also uses relish to give
her sauce even more of a kick.
By allowing his homemade sauce to sit for 30 minutes,
Frank is allowing the essential oils from the fresh herbs
to solubilize in the liquids.
And the flavors have time to fuse together
and create a homogeneous mixture.
All three of our chefs created delicious onion rings
using rather distinct methods,
which each coming away truly happy with their results.
Best onion ring ever.
You can always mix and match from each recipe
to create your perfect onion ring snack.
[energetic upbeat music]

4 Levels of Chocolate Chip Cookies: Amateur to Food Scientist

4 Levels of Spaghetti & Meatballs: Amateur to Food Scientist

4 Levels of Brownies: Amateur to Food Scientist
4 Levels of Mac and Cheese: Amateur to Food Scientist

4 Levels of Hamburgers: Amateur to Food Scientist

4 Levels of French Toast: Amateur to Food Scientist
4 Levels of Omelets: Amateur to Food Scientist

4 Levels of Ice Cream Sundaes: Amateur to Food Scientist

4 Levels of Pizza: Amateur to Food Scientist

4 Levels of Fried Chicken: Amateur to Food Scientist

4 Levels of Pancakes: Amateur to Food Scientist

4 Levels of Lasagna: Amateur to Food Scientist

4 Levels of Tacos: Amateur to Food Scientist

4 Levels of Waffles: Amateur to Food Scientist

4 Levels of Cinnamon Rolls: Amateur to Food Scientist

4 Levels of Steak: Amateur to Food Scientist
4 Levels of Fettuccine Alfredo: Amateur to Food Scientist

4 Levels of French Fries: Amateur to Food Scientist

4 Levels of Cupcakes: Amateur to Food Scientist

4 Levels of Grilled Cheese: Amateur to Food Scientist

4 Levels of Chicken Soup: Amateur to Food Scientist

4 Levels of Carrot Cake: Amateur to Food Scientist
4 Levels of Chili: Amateur to Food Scientist

4 Levels of Chicken Wings: Amateur to Food Scientist
4 Levels of Mashed Potatoes: Amateur to Food Scientist
4 Levels of Roast Chicken: Amateur to Food Scientist
4 Levels of Cheesecake: Amateur to Food Scientist

4 Levels Of Burritos: Amateur to Food Scientist

4 Levels of Doughnuts: Amateur to Food Scientist

4 Levels of Sushi: Amateur to Food Scientist

4 Levels of Hot Dogs: Amateur to Food Scientist

4 Levels of Salmon: Amateur to Food Scientist
4 Levels of Scrambled Eggs: Amateur to Food Scientist

4 Levels of Onion Rings: Amateur to Food Scientist

4 Levels of Ramen: Amateur to Food Scientist

4 Levels of Fried Rice: Amateur to Food Scientist

4 Levels of Apple Pie: Amateur to Food Scientist

4 Levels of Chocolate Cake: Amateur to Food Scientist

4 Levels of Nachos: Amateur to Food Scientist

4 Levels of Potato Salad: Amateur to Food Scientist

4 Levels of Breakfast Sandwiches: Amateur to Food Scientist

4 Levels of Enchiladas: Amateur to Food Scientist

4 Levels of Banana Bread: Amateur to Food Scientist
4 Levels of Dumplings: Amateur to Food Scientist
4 Levels of Fish & Chips: Amateur to Food Scientist

4 Levels of Veggie Burgers: Amateur to Food Scientist

4 Levels of Grilled Fish: Amateur to Food Scientist
4 Levels of Tarts: Amateur to Food Scientist

4 Levels of Tostadas: Amateur to Food Scientist

4 Levels of Gumbo: Amateur to Food Scientist

4 Levels of Stuffed Peppers: Amateur to Food Scientist

4 Levels of Chicken Sandwich: Amateur to Food Scientist

4 Levels of Biscuits: Amateur to Food Scientist

4 Levels of Custard: Amateur to Food Scientist

4 Levels of Meatballs: Amateur to Food Scientist

4 Levels of Sandwich Cookies: Amateur to Food Scientist

4 Levels of Kebabs: Amateur to Food Scientist

4 Levels of Flatbread: Amateur to Food Scientist

4 Levels of Bloody Mary: Amateur to Food Scientist

4 Levels of Pad Thai: Amateur to Food Scientist
4 Levels of Spring Rolls: Amateur to Food Scientist
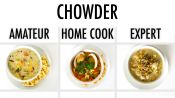
4 Levels of Chowder: Amateur to Food Scientist
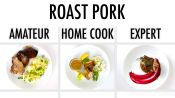
4 Levels of Roast Pork: Amateur to Food Scientist

4 Levels of Shrimp & Grits: Amateur to Food Scientist

4 Levels of Curry: Amateur to Food Scientist
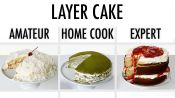
4 Levels of Layer Cake: Amateur to Food Scientist
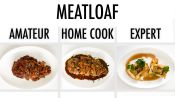
4 Levels of Meatloaf: Amateur to Food Scientist

4 Levels of Pigs In A Blanket: Amateur to Food Scientist
4 Levels of Biryani: Amateur to Food Scientist
4 Levels of Baked Potato: Amateur to Food Scientist
4 Levels of Ravioli: Amateur to Food Scientist
4 Levels of Pork Chops: Amateur to Food Scientist

4 Levels of Paella: Amateur to Food Scientist
4 Levels of Milkshakes: Amateur to Food Scientist
4 Levels of Crepes: Amateur to Food Scientist

4 Levels of Pulled Pork Sandwiches: Amateur to Food Scientist

4 Levels of Birthday Cake: Amateur to Food Scientist

4 Levels of Chips & Guacamole: Amateur to Food Scientist

4 Levels of Eggs Benedict: Amateur to Food Scientist

4 Levels of Pudding: Amateur to Food Scientist

4 Levels of Lamb Chops: Amateur to Food Scientist

4 Levels of Turkey Sandwiches: Amateur to Food Scientist
4 Levels of Chicken Nuggets: Amateur to Food Scientist

4 Levels of Sugar Cookies: Amateur to Food Scientist

4 Levels of Hot Chocolate: Amateur to Food Scientist

4 Levels of Lobster Rolls: Amateur to Food Scientist

4 Levels of Baked Ziti: Amateur to Food Scientist

4 Levels of Buffalo Wings: Amateur to Food Scientist

4 Levels of Quesadilla: Amateur to Food Scientist

4 Levels of Poutine: Amateur to Food Scientist

4 Levels of Tamales: Amateur to Food Scientist

4 Levels of Ice Cream Sandwich: Amateur to Food Scientist

4 Levels of Pasta Bolognese: Amateur to Food Scientist

4 Levels of Fish Tacos: Amateur to Food Scientist

4 Levels of Mozzarella Sticks: Amateur to Food Scientist

4 Levels of Empanadas: Amateur to Food Scientist

4 Levels of Cacio e Pepe: Amateur to Food Scientist

4 Levels of Chicken Parm: Amateur to Food Scientist

4 Levels of Samosas: Amateur to Food Scientist

4 Levels of Boneless Wings: Amateur to Food Scientist
4 Levels of Garlic Bread: Amateur to Food Scientist

4 Levels of Caesar Salad: Amateur to Food Scientist

4 Levels of Tater Tots: Amateur to Food Scientist

4 Levels of Egg Rolls: Amateur to Food Scientist

4 Levels of Chips & Queso: Amateur to Food Scientist

4 Levels of BLT: Amateur to Food Scientist

4 Levels of Calamari: Amateur to Food Scientist

4 Levels of Pesto Pasta: Amateur to Food Scientist
4 Levels of Pasta Carbonara: Amateur to Food Scientist
4 Levels of Deviled Eggs: Amateur to Food Scientist
4 Levels of Chicken Tenders: Amateur to Food Scientist

4 Levels of Frittata: Amateur to Food Scientist

4 Levels of Tiramisu: Amateur to Food Scientist

4 Levels of Risotto: Amateur to Food Scientist

4 Levels of Strawberry Shortcake: Amateur to Food Scientist

4 Levels of Gnocchi: Amateur to Food Scientist

4 Levels of BBQ Ribs: Amateur to Food Scientist

4 Levels of Ice Cream Cake: Amateur to Food Scientist

4 Levels of Deep Dish Pizza: Amateur to Food Scientist

4 Levels of Jerk Chicken: Amateur to Food Scientist